
# How to use the platform
The platform consists of dashboard, device management, alarm management, personnel management, location management and system management.
# Register and Login
Before registering, users need to contact the administrator to obtain the registration code. After the registration is successful, users can log in to the home page of the locating platform.
# Dashboard
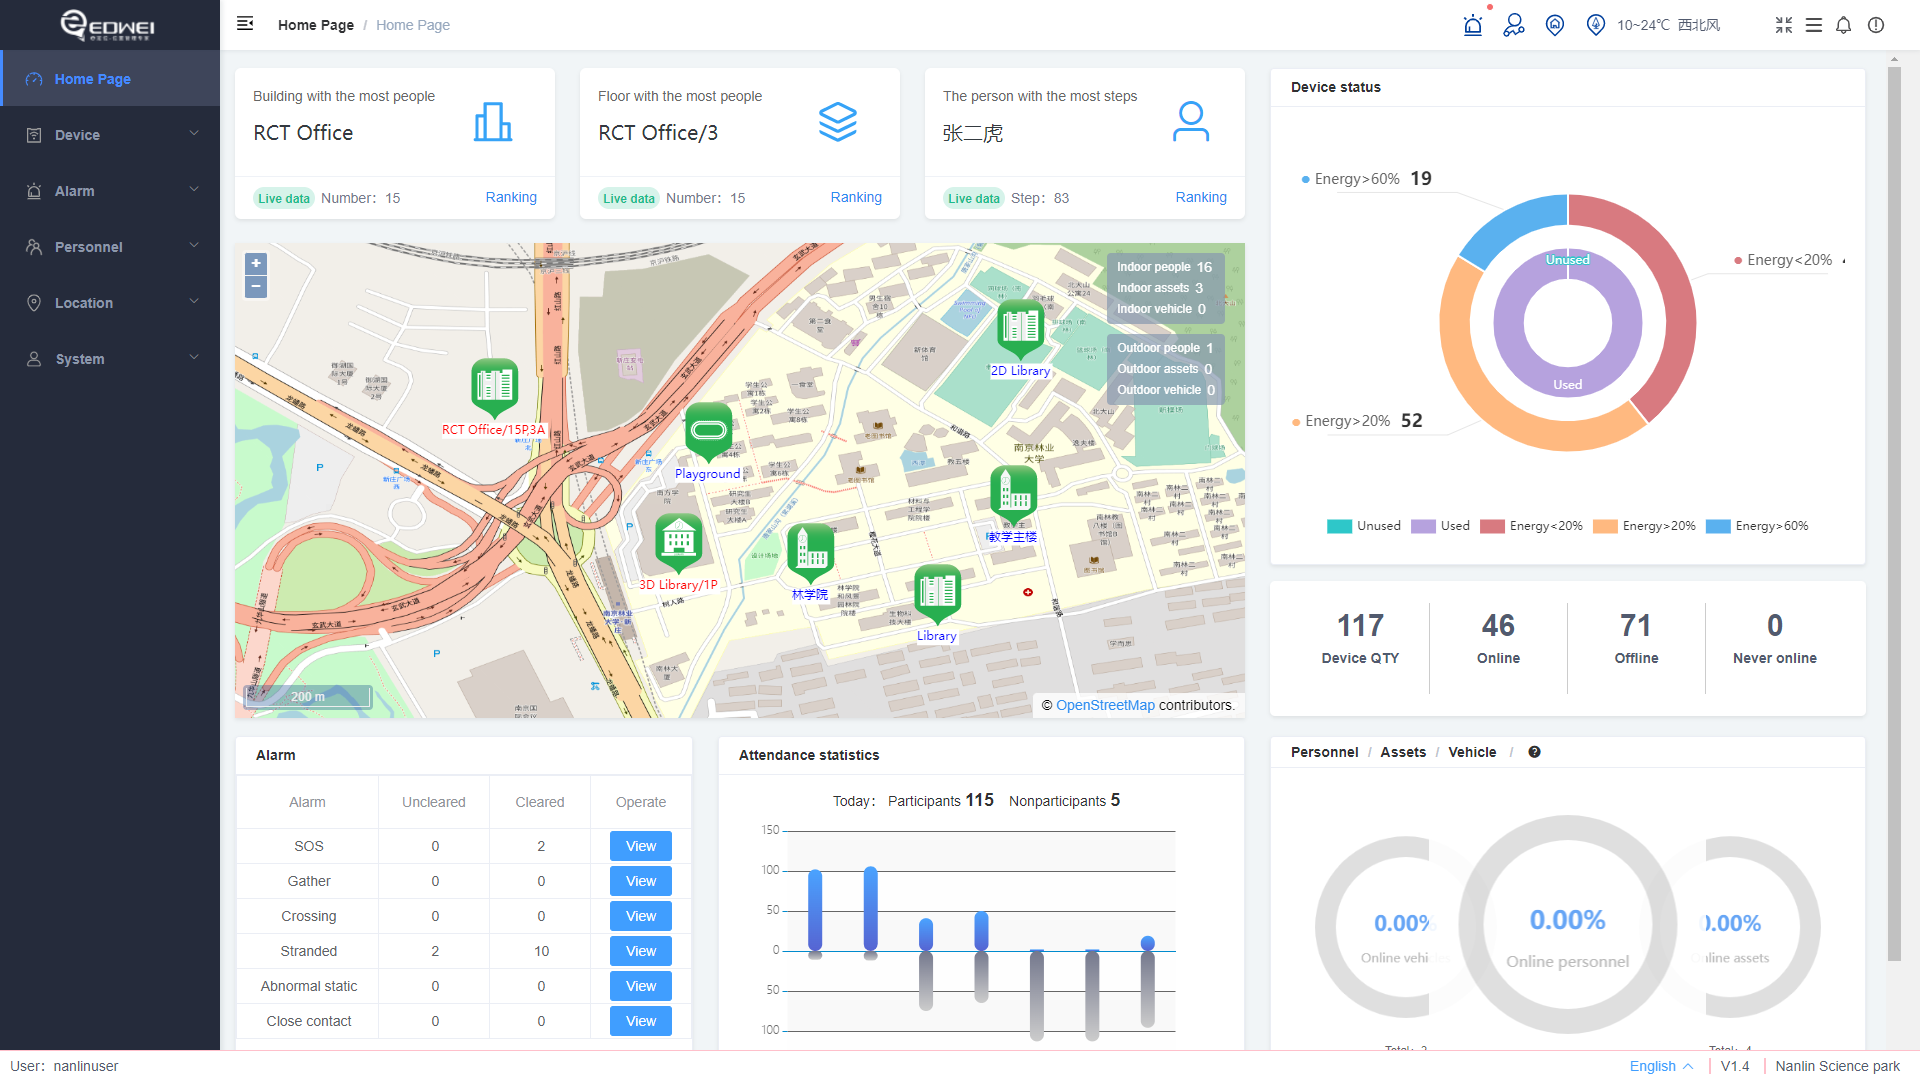
The dashboard summarizes the statistical data of devices, alarm, attendance, personnel and assets, as shown in the figure. Click the full-screen icon in the upper right corner to enter the full-screen operation mode.
# Device Management
Device management includes tracker management and beacon management. In beacon fixed project, the tracker refers to the badge or T-Box. In beacon mobile project, the terminal refers to a BLE gateway or a BLE gateway in the form of badge.
# Tracker Management
Displays information about terminal devices. You can query and refresh device information.
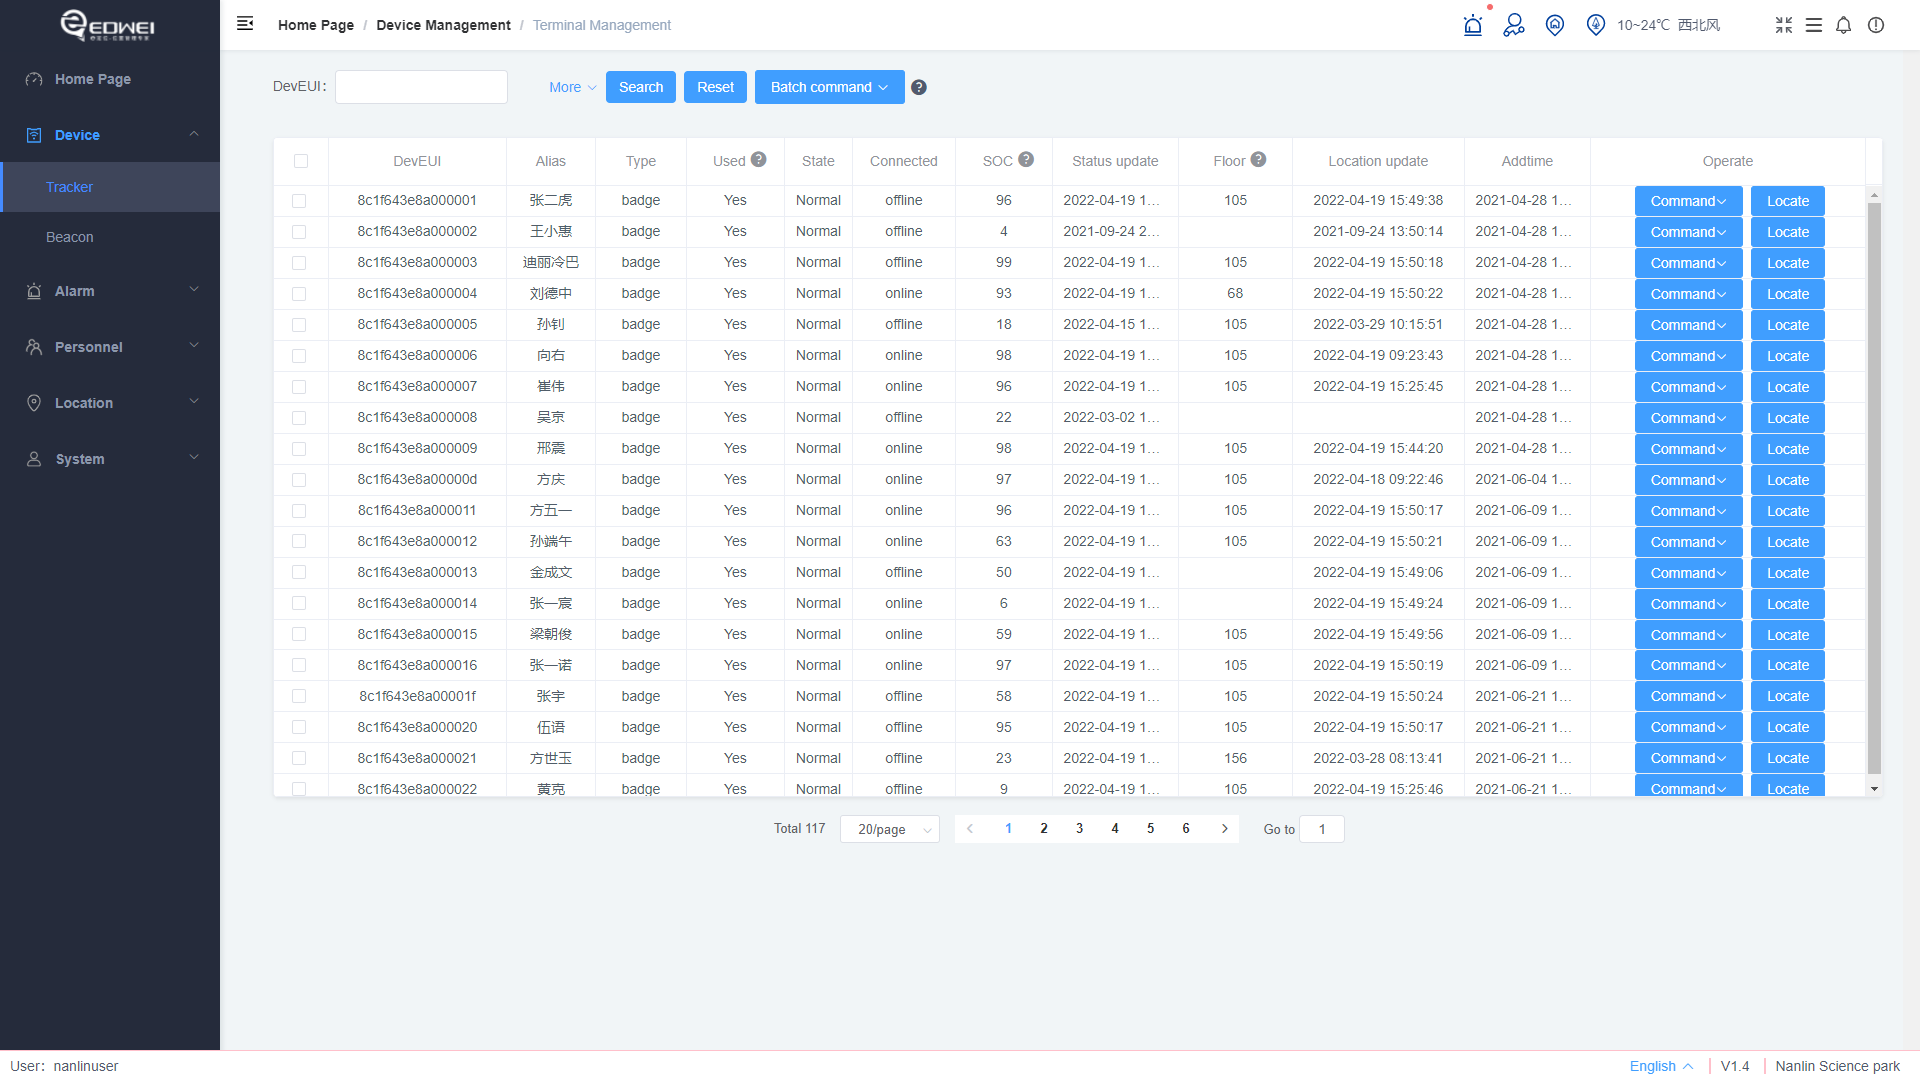
Command:
- Remote reboot: Restart the device.
- Remote shutdown: Shutdown the device.
- Remote search: Sends a search command to a terminal device. The terminal device will beep till receive the cancel search command.
- Cancel search: The terminal device stops beeping after receiving the command.
- Request location: Send the request location instruction to the terminal device, and the terminal device immediately report its location even it is stationary.
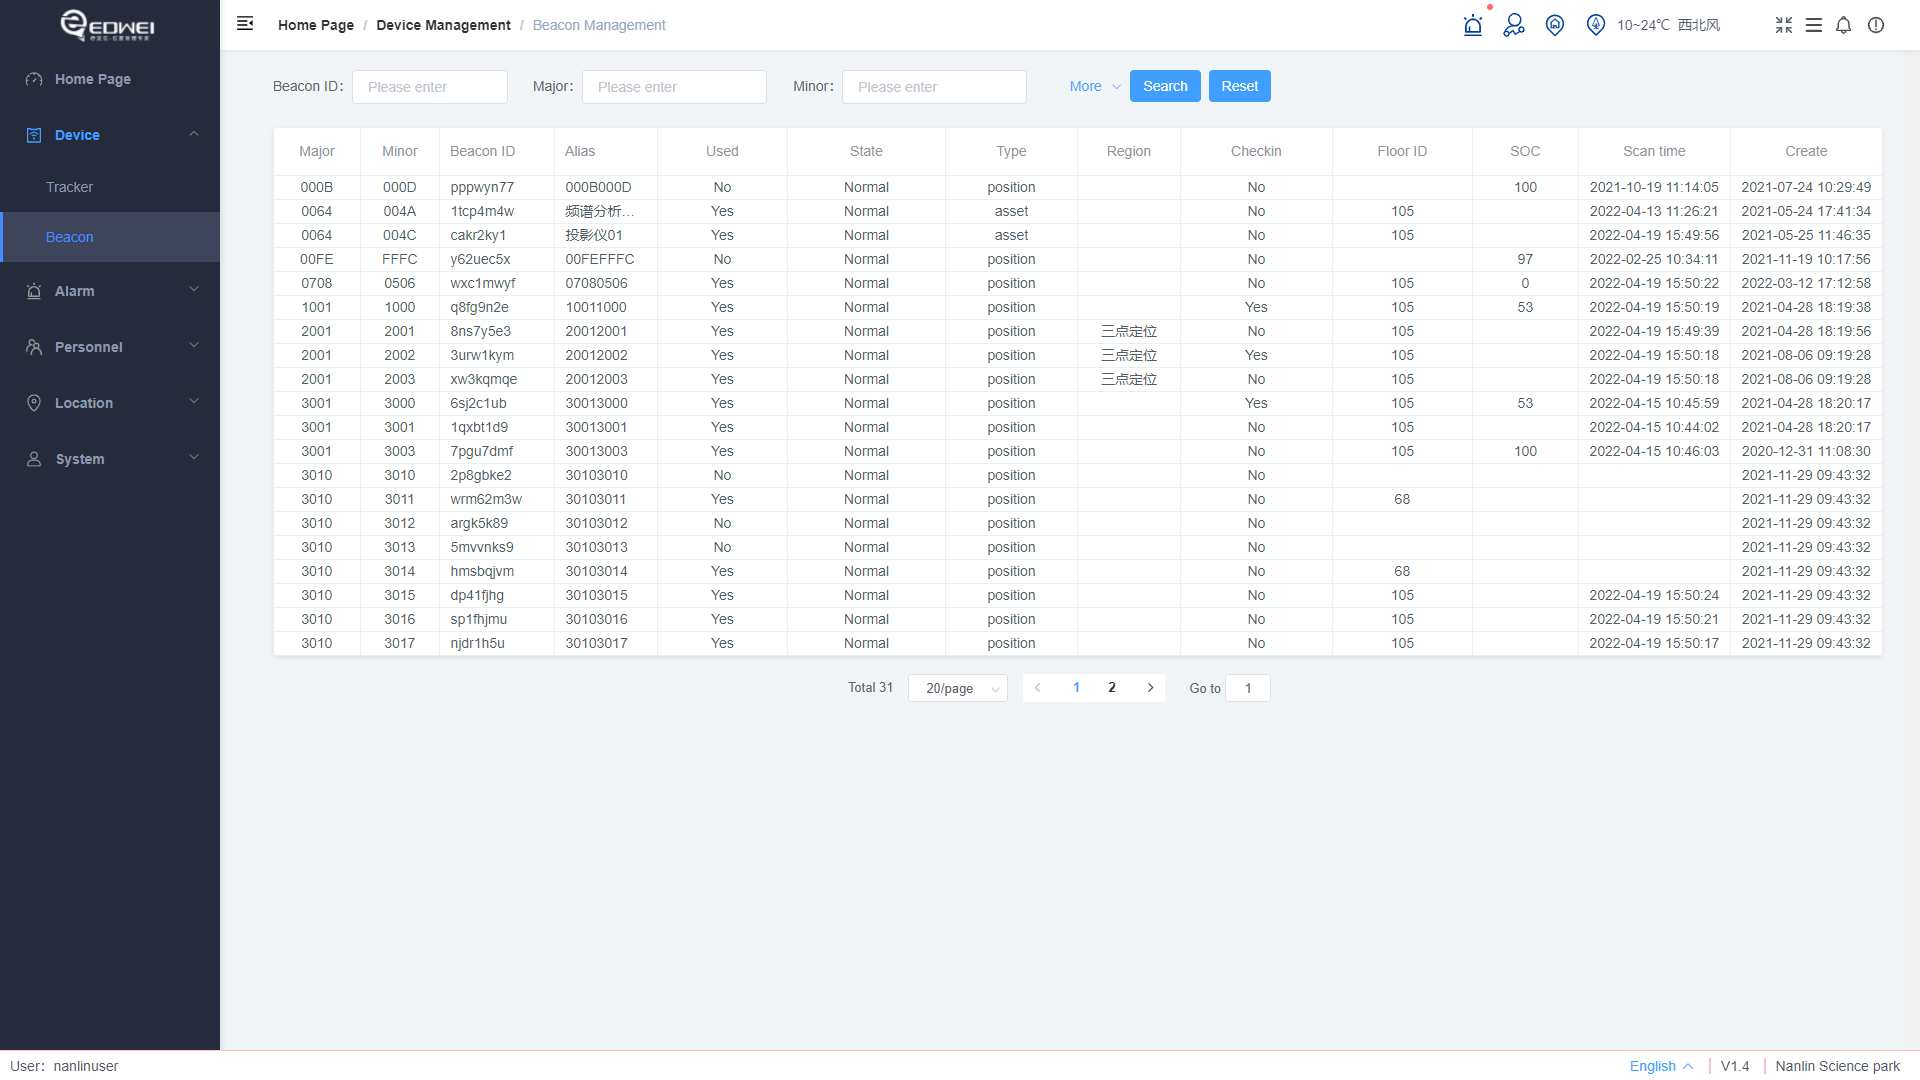
# Beacon Management
Display beacon information, you can query and refresh beacon information, such as use status, the deployed area, battery, the last time to be scanned. In addition to the standard iBeacon, Tracker supports a variety of 3rd party non-standard beacons, such as Bluetooth bracelets, asset beacons with accelerometers, asset beacons with light sensors, and more. You can contact the administrator for more information about these 3rd party beacons.
# Alarm Management
# Alarm Management
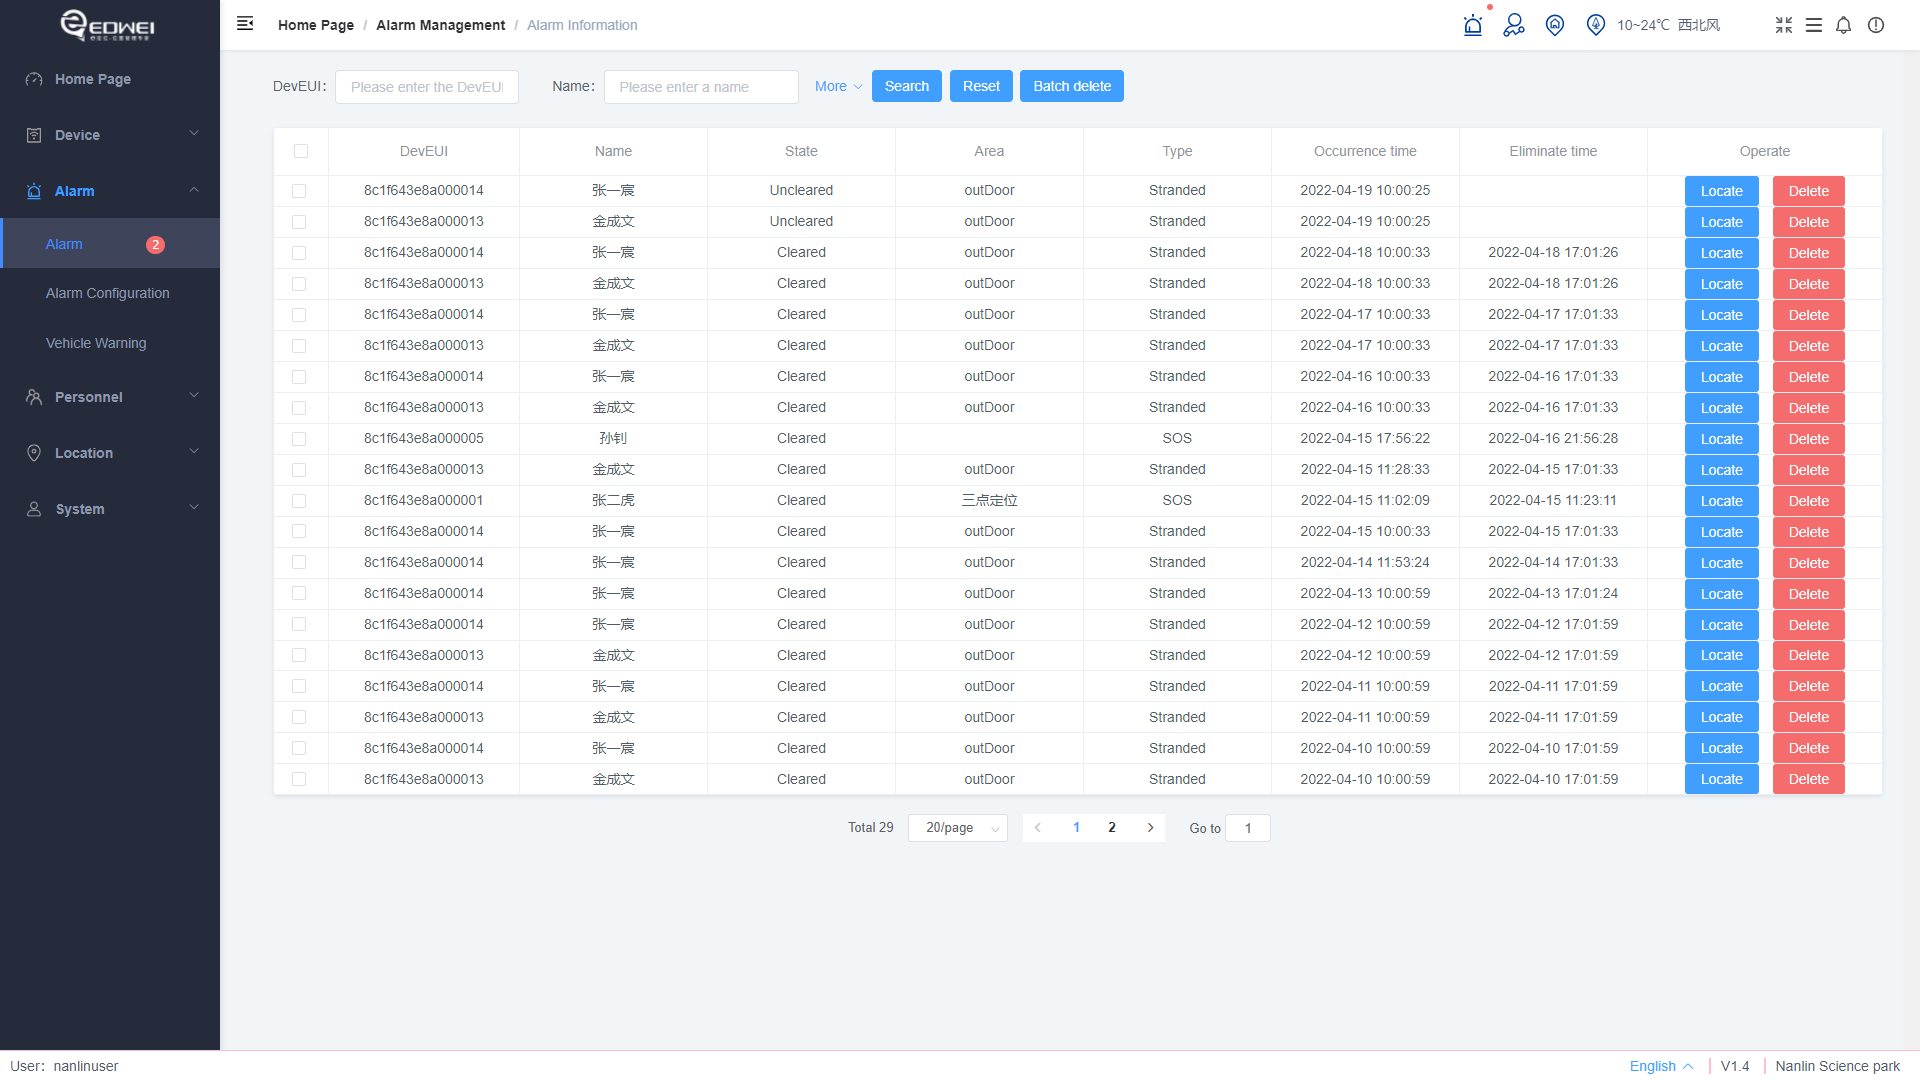
Displays alarm information about terminals. You can query, refresh, and delete alarm records in batches. You can also obtain the location where the current alarm occurs. The supported alarm types include SOS, gather, crossing, stranded, abnormal static and close contact.
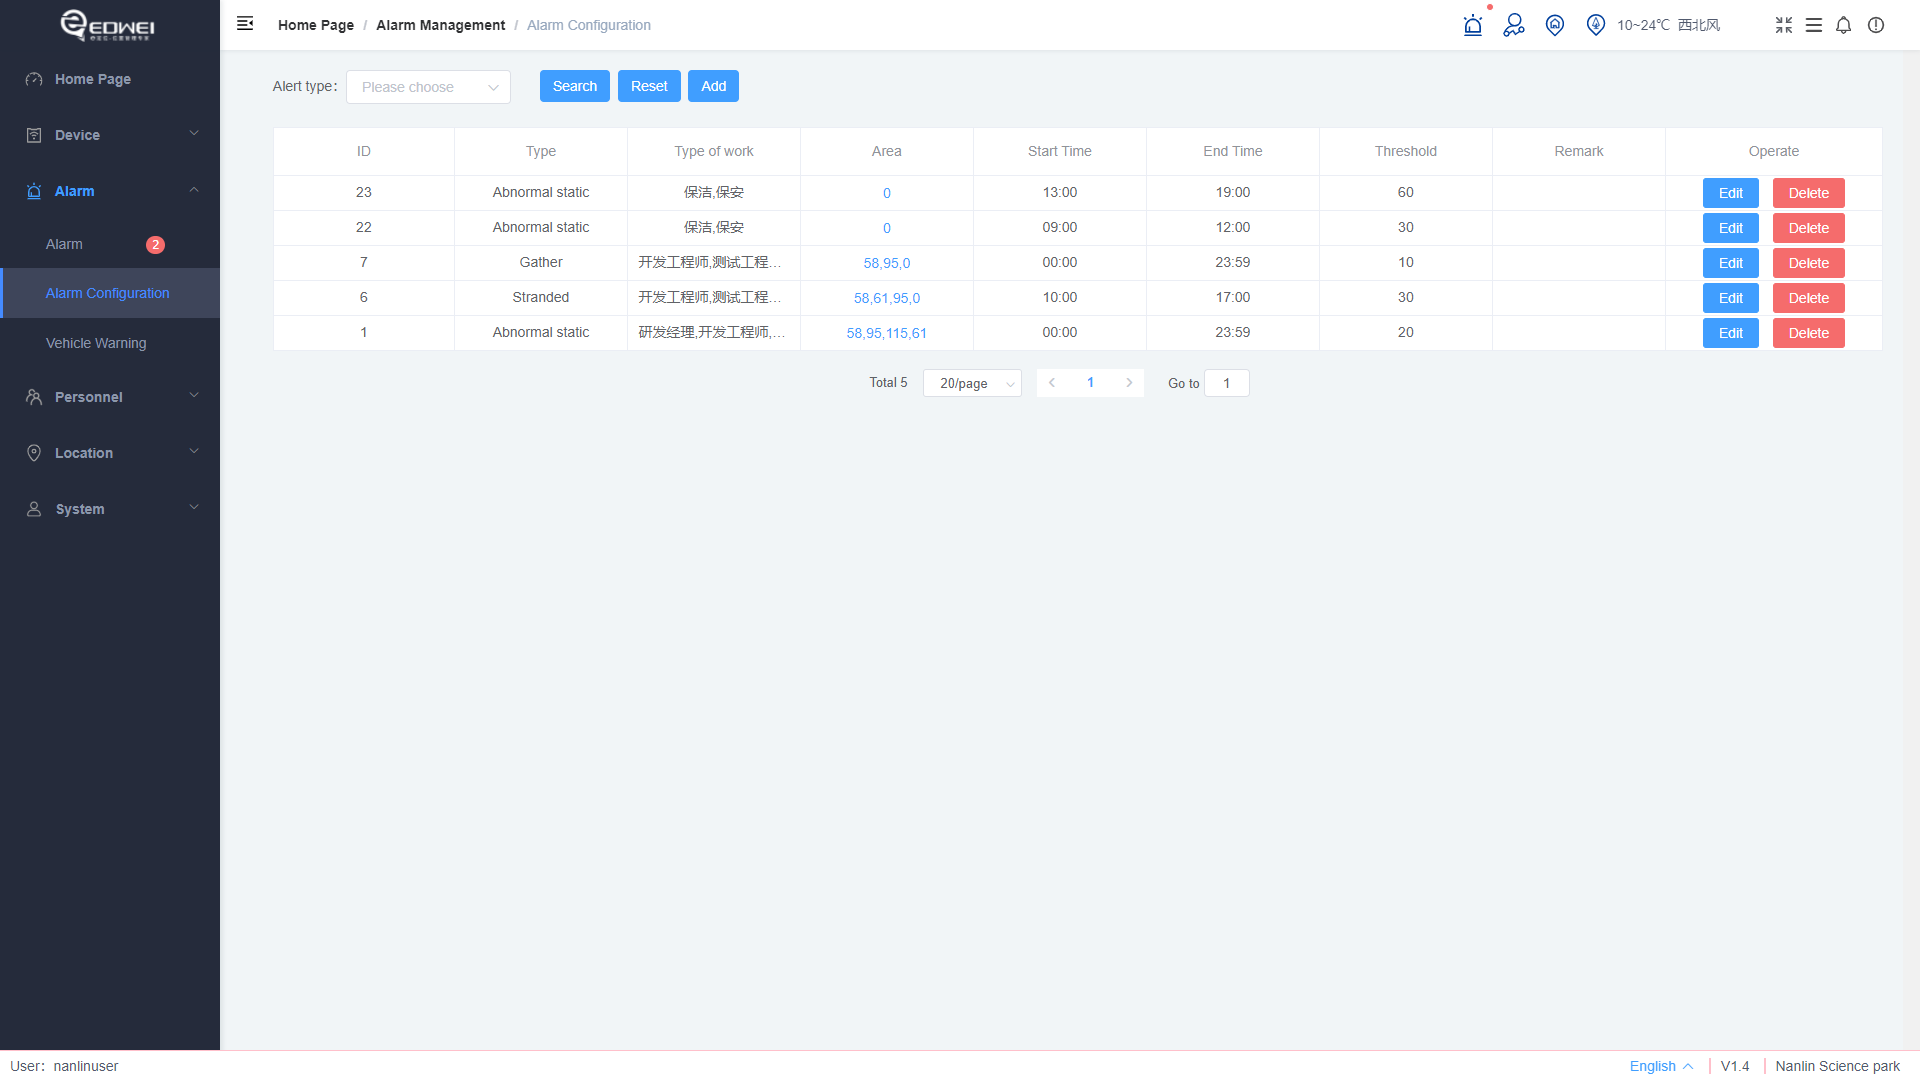
# Alarm Configuration
In the preceding alarms, The SOS is triggered by pressing the button, the crossing alarm is triggered by the detected alarm beacon, and the close contact alarm is triggered based on the social security parameters of the current device and whether other devices with related functions enabled are detected. Gather, stranded, and abnormal static can set trigger conditions in the server, according to work type, regions, time periods, and thresholds.
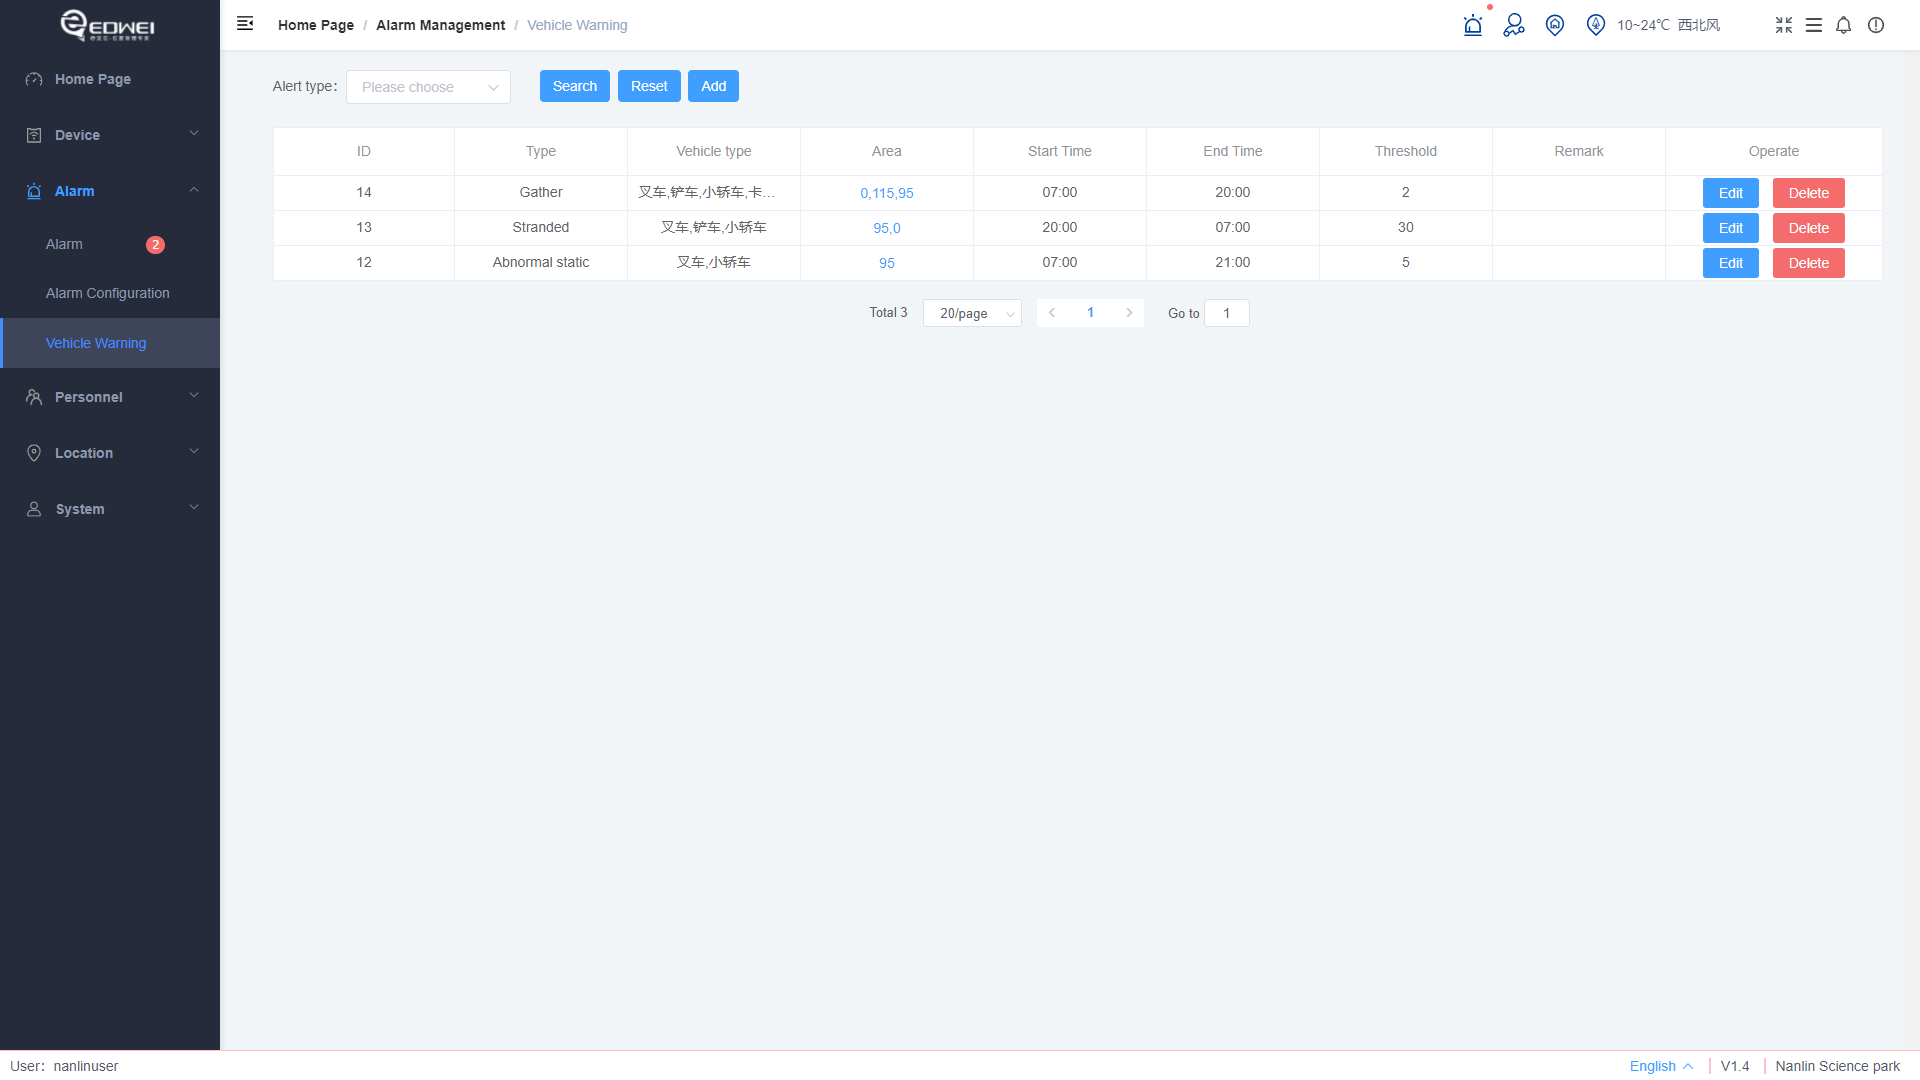
# Vehicle Warning
For vehicle, it supports crossing, gather, stranded and abnormal static alarm. The trigger conditions can be set in the server, according to vehicle type, regions, time periods, and thresholds. The vehicle management function can be set by the administrator as required.
# Personnel
Personnel management includes five functions: employee, asset, vehicle, attendance and inspection management. Except for employee management, other functions can be set visible or invisible by the administrator as required.
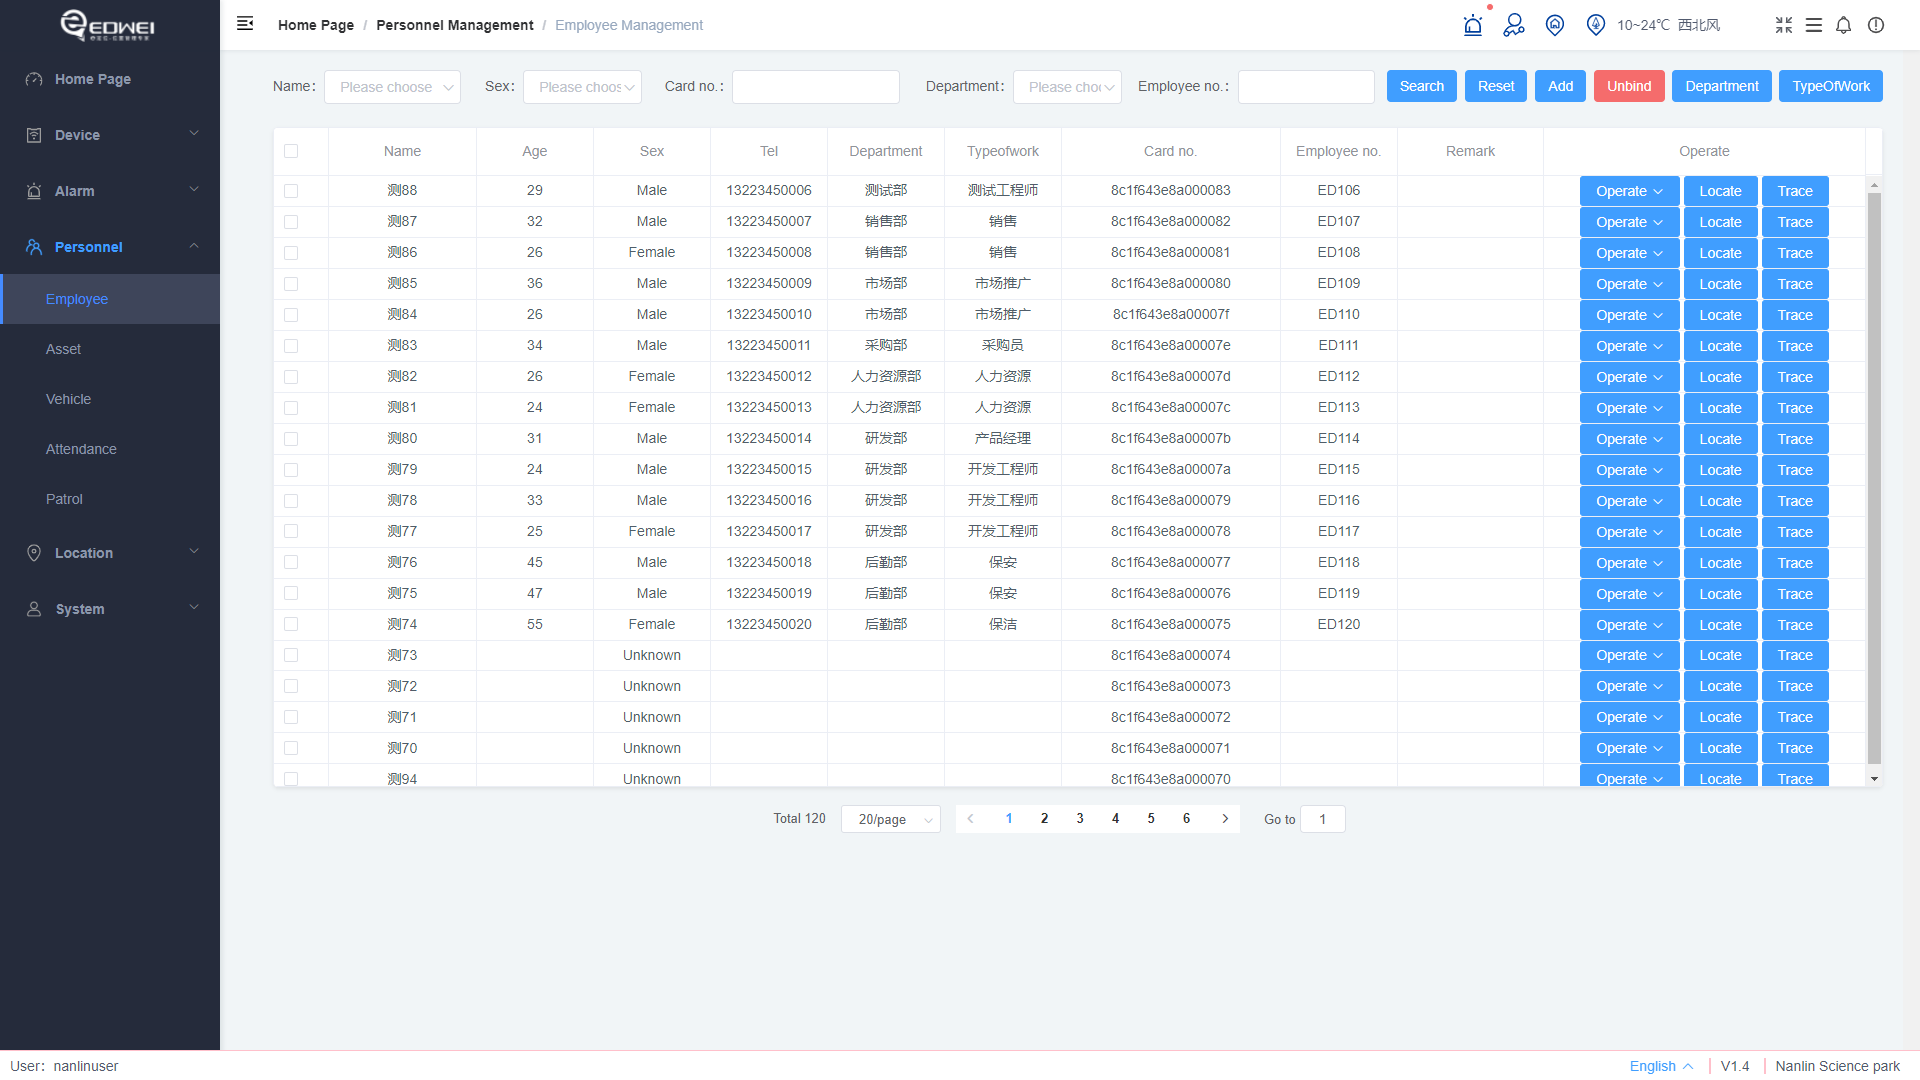
# Employee
Employee management page can manage employees, query, refresh and maintain employees' personal information, bind or unbind employees' badges, set enterprise departments or types of work, and query the movement track of employees.
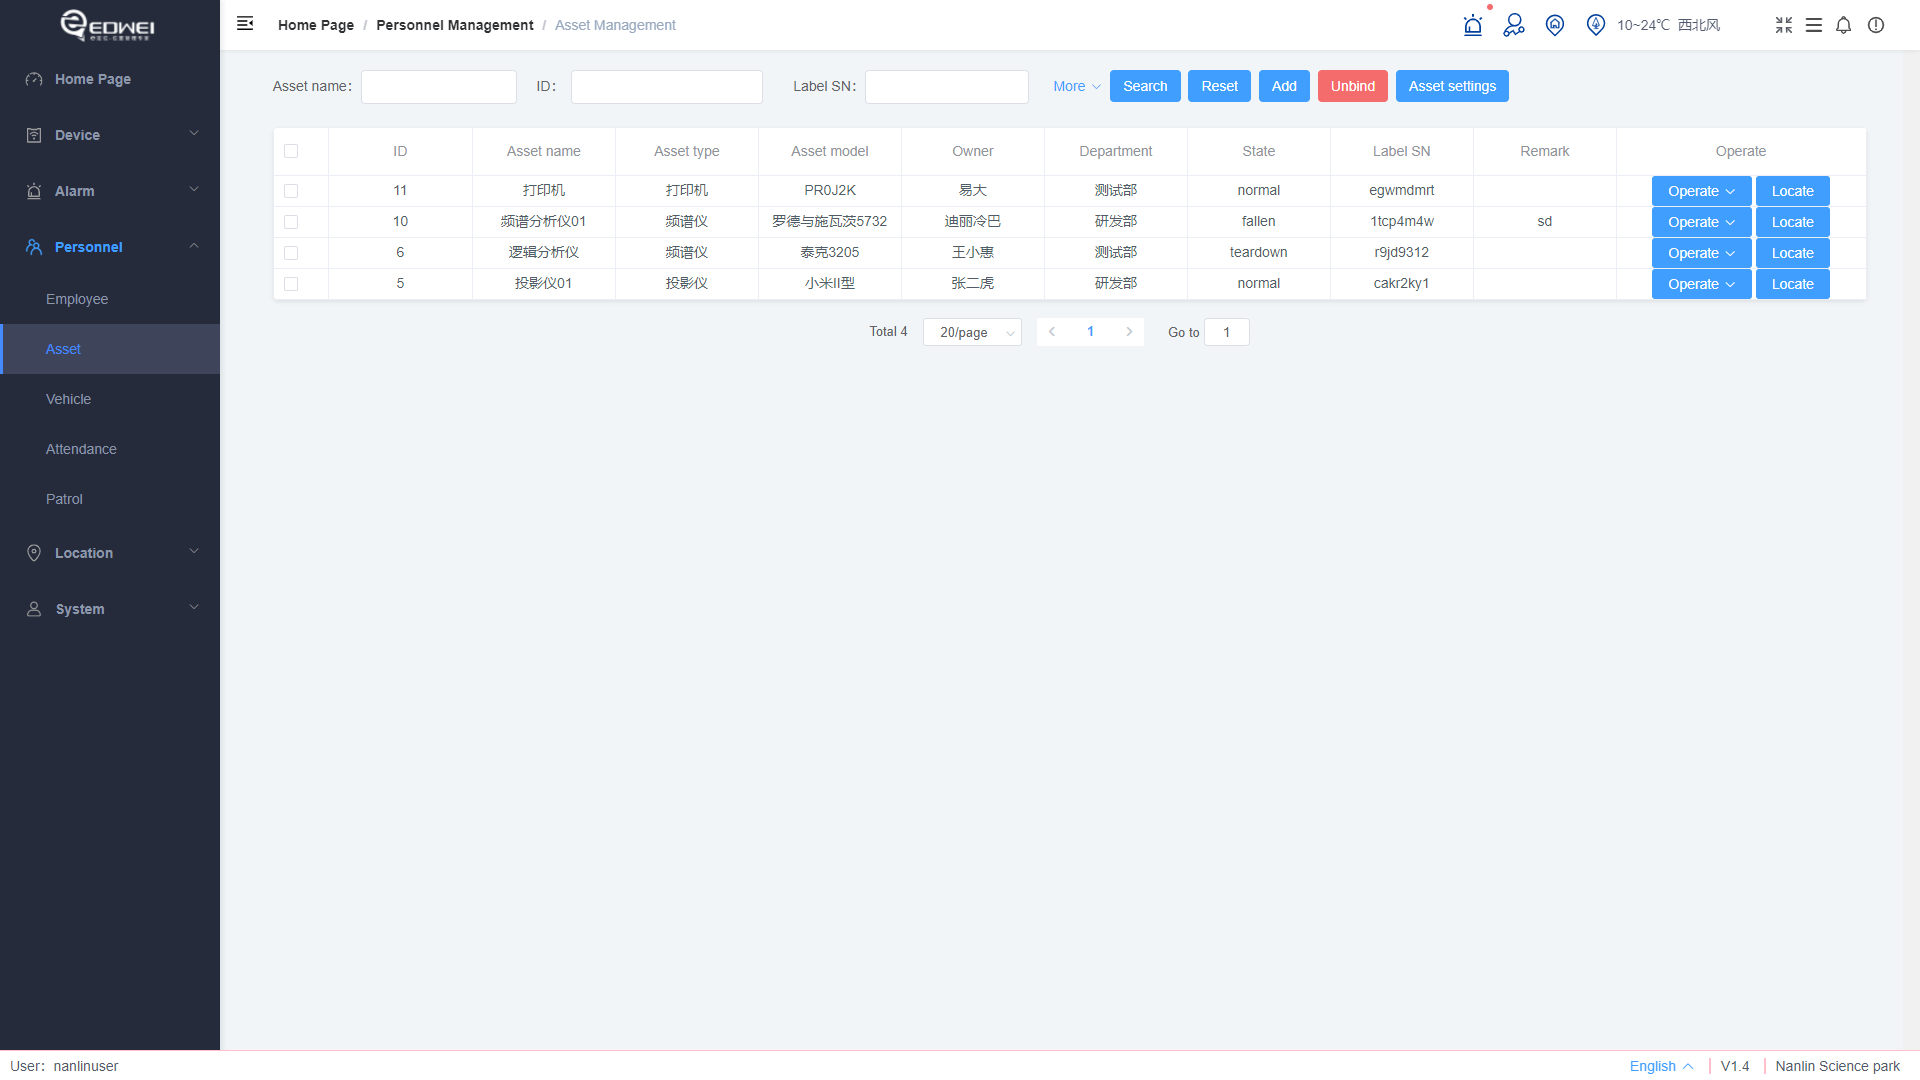
# Asset
On the Asset management page, you can query, refresh, add, unbind, and set assets. Asset information includes name, type, model, owner, department, current status, and bound label. Assets can be tied to various Bluetooth tags, such as iBeacon for positioning only, acceleration sensor for attitude recognition, and light sense with anti-detachable function. By setting the parameters, the positioning terminal can support BLE beacons with various functions. If you need more functions, you can contact the administrator. Click position on the asset entry to jump to the location of the corresponding map, as shown in the figure.
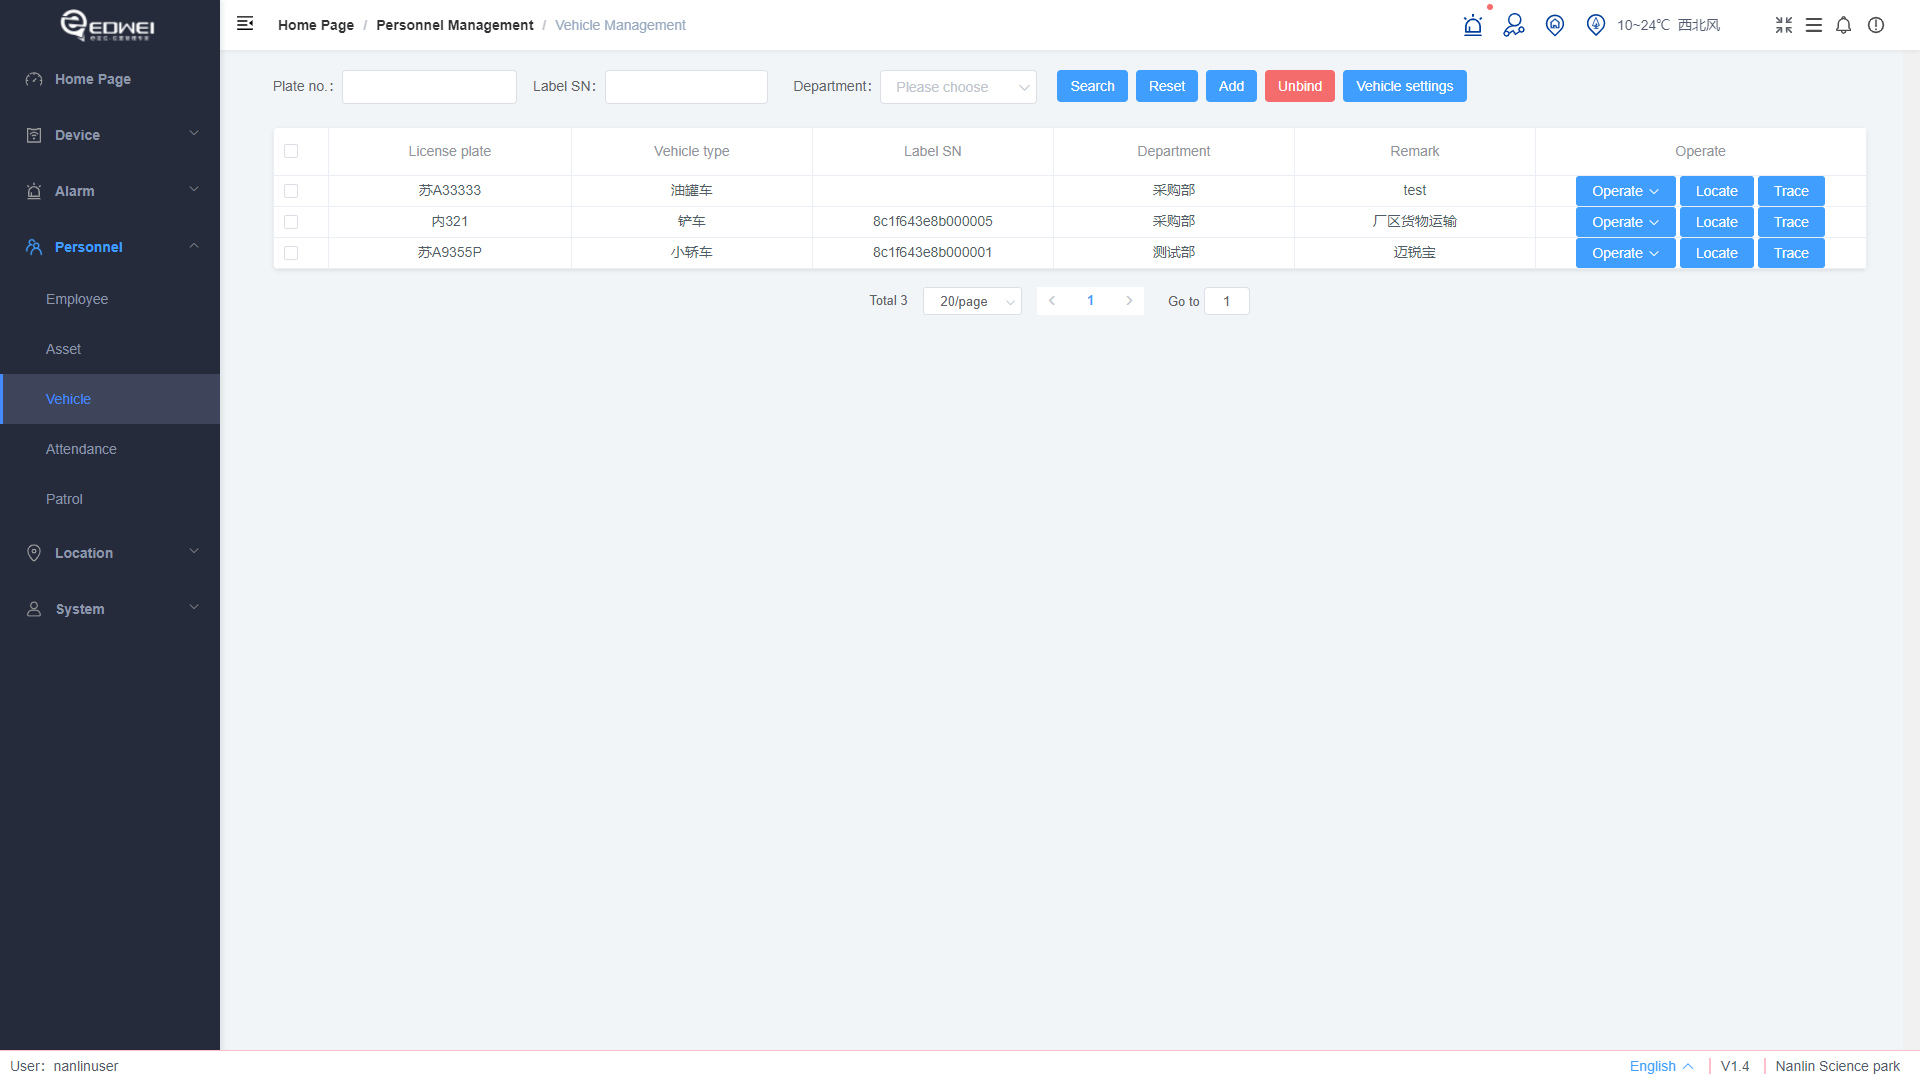
# Vehicle
The vehicle management page displays the vehicle information, can query, refresh, maintain the vehicle, bind, unbind the vehicle, set the vehicle type. Click the location of the vehicle entry to jump to the location of the corresponding map, as shown in the picture.
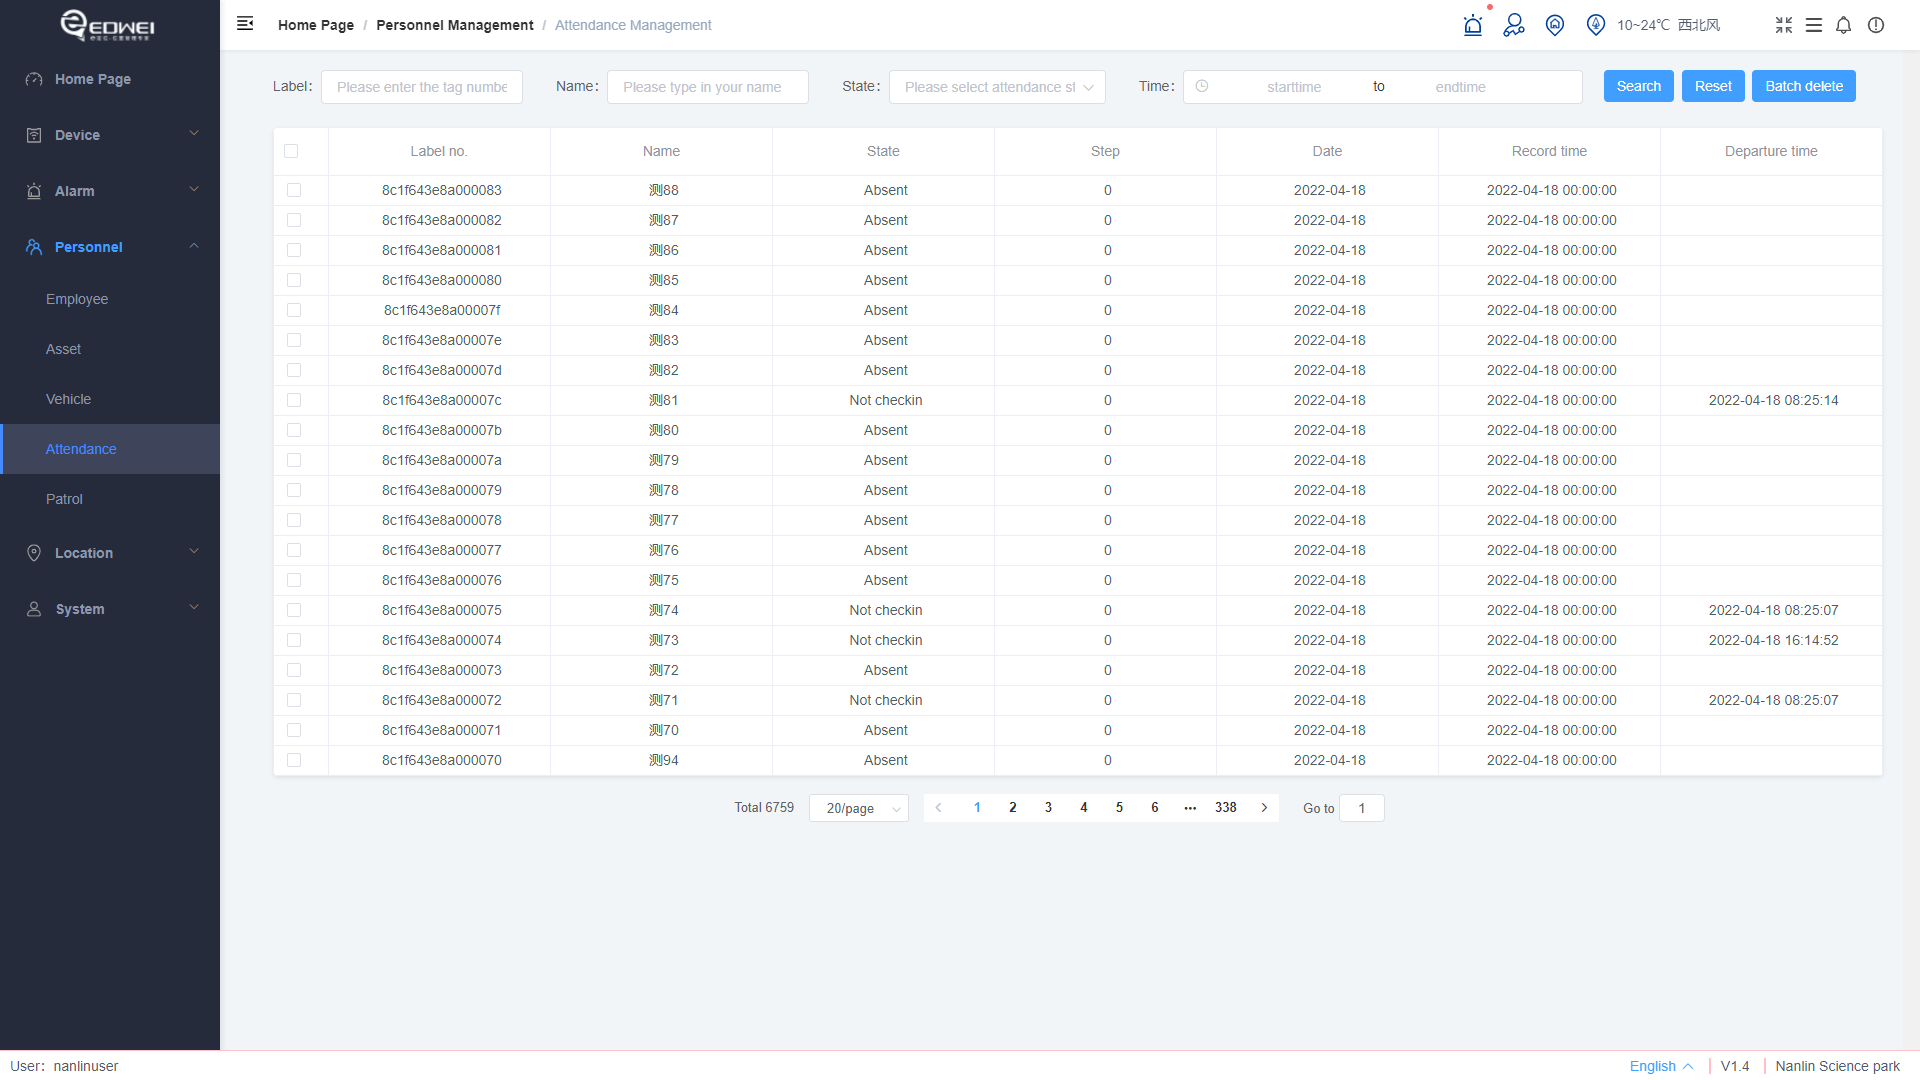
# Attendance
Attendance management can display attendance information, query, refresh, and delete it in batches. If the employee does not bind the badge, he/she will not participate in attendance.
# Patrol
This function is used for daily patrol management of the project site. Beacons are arranged in the place where the patrol is needed to effectively manage the patrol personnel. Patrol tasks can be set by month, week, or day. For valid patrol tasks, the system generates patrol task information within the validity period for assigned personnel every day. You can view the patrol task information on the inspection History page. The inspection management page consists of inspection task and history.
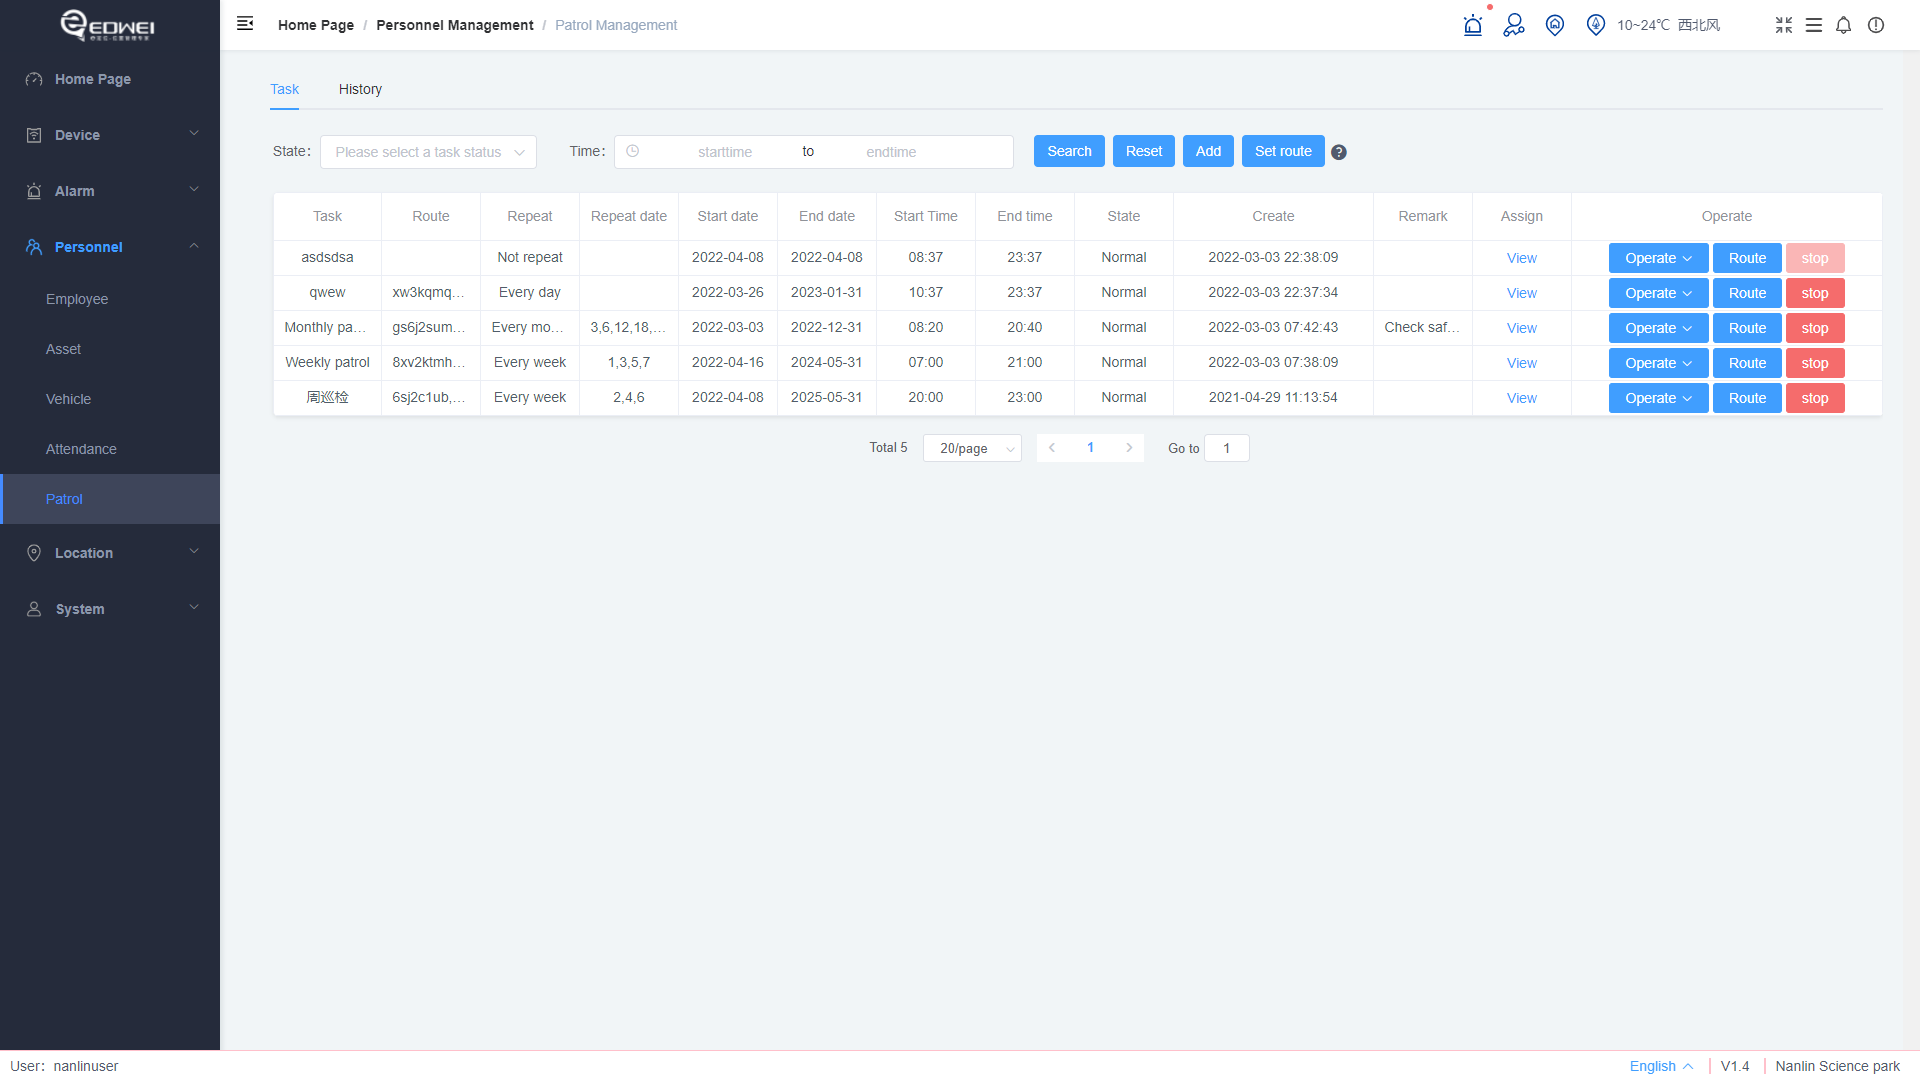
Set the inspection task method
- Click Add, enter related information, and set the inspection task.
- Select a task, click Set route, click the beacons to pass through, and click Save to generate an inspection route.
- Return to the inspection task, click Assign in the operation, and select the employee to be inspected to assign the task. To Stop a periodic inspection task, click Stop.
- Click route to view the inspection route.
# Location
The positioning management interface is divided into six parts: map management, building management, floor management, floor details, outdoor positioning and indoor positioning. Floor details are always visible, other parts are controlled by the administrator, if not visible please contact the administrator.
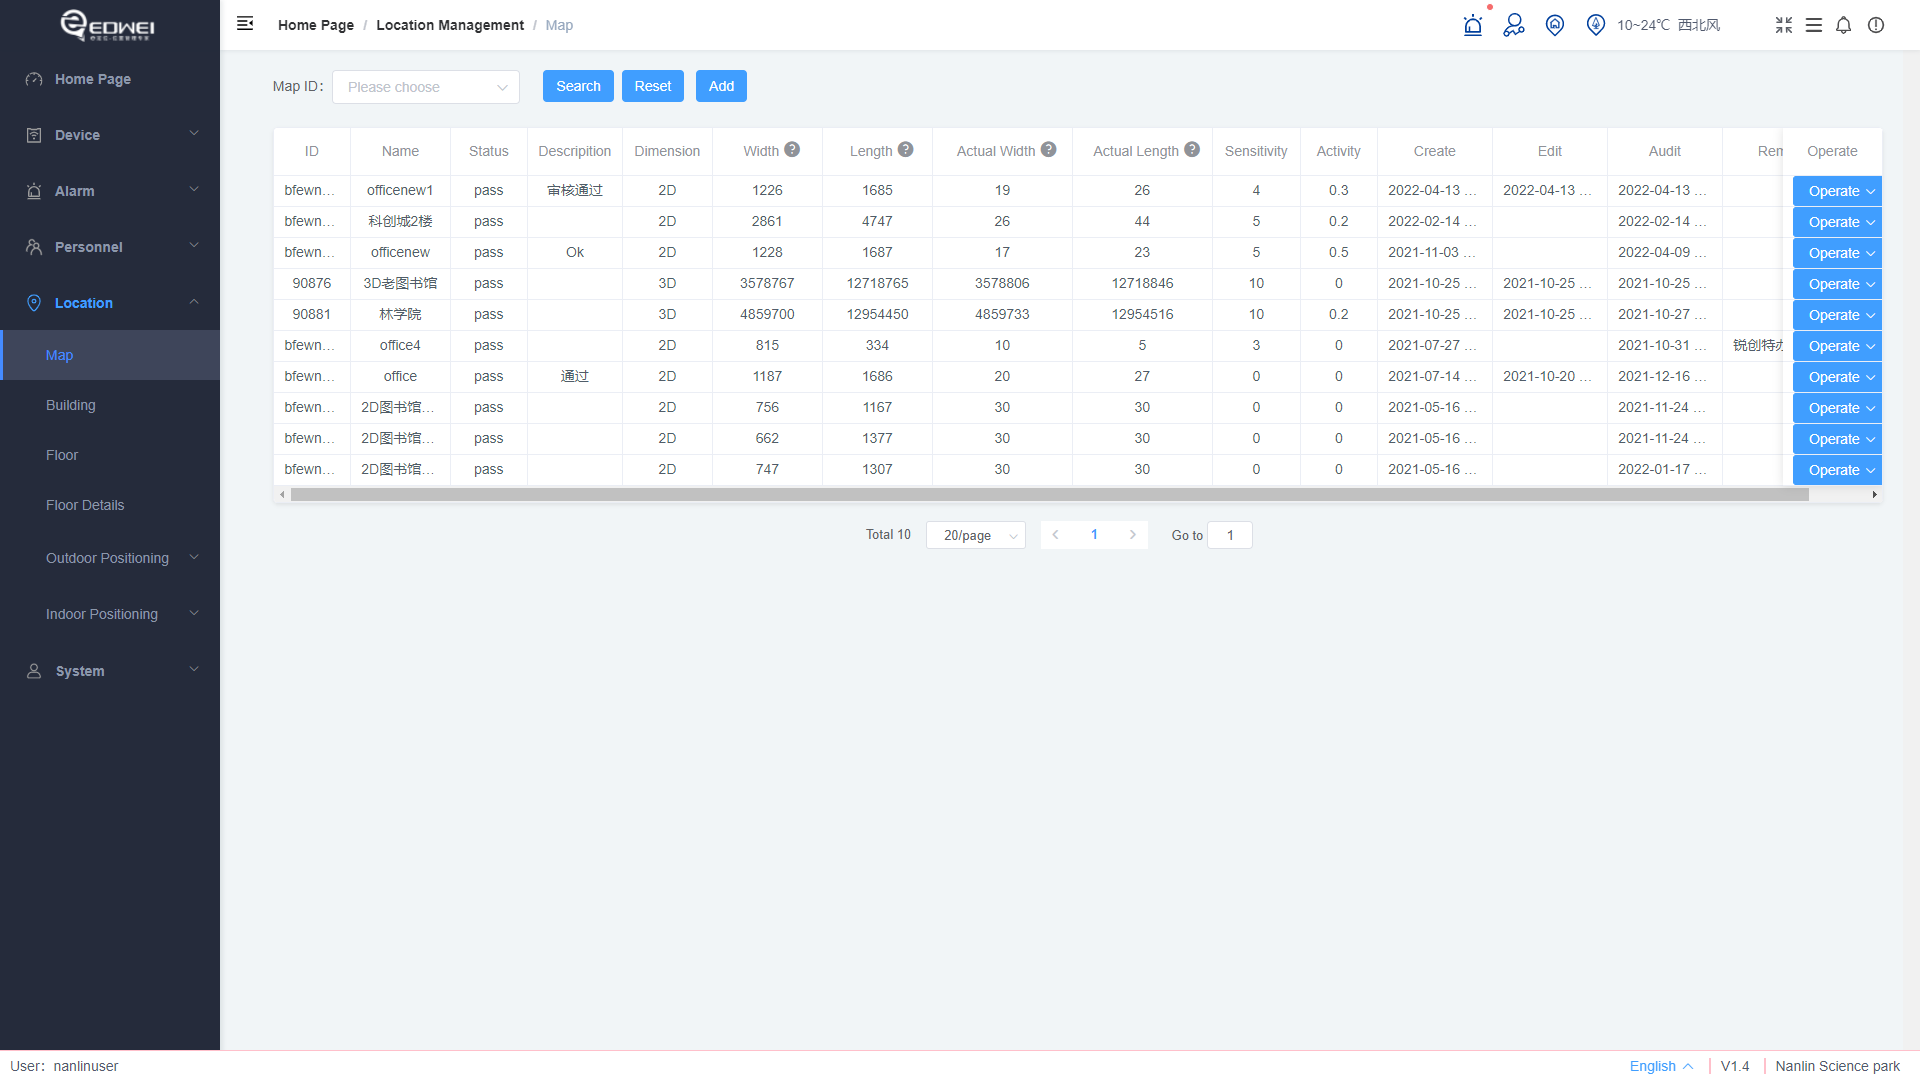
# Map
You can add 2D map or 3D map. If you select 2D map, you can upload map pictures directly. If you select 3D map, contact the administrator to make a 3D map. The supported image types include JPG, JPEG, PNG, and SVG. After uploading a map, you can set the map size automatically.
prompt
When adding a map, click "Ok", the map will be saved in draft state. Click the "Submit" button, the map will be submitted for review and the state will be changed to audit, after approved by the system administrator the state will be pass.
# Building
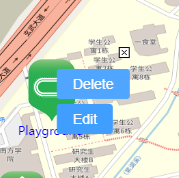
The deployment of the building is completely visual. Select the icon to be placed on the right of the page, move the mouse pointer to the location where the icon is to be placed, and click to finish placing the icon. After the layout is complete, the system automatically saves the configuration. For specific operations, you can click the demo below for reference.

Right click icon to delete, edit the added building, you can change the building name and icon.
# Floor
After adding a building, you need to add the corresponding floors to the building and map the corresponding floors. Multiple floors can be added at the same time, and multiple floors can share a map. The specific method for adding floors is as follows.
The floor range is -5 to 100, negative numbers indicate underground floors.
Format 1: single floor, example1:-1, example2: 3
Format 2: multiple adjacent floors, example: 2~18
Format 3: multiple non-adjacent floors, example: 2, 5, 7, 8~10
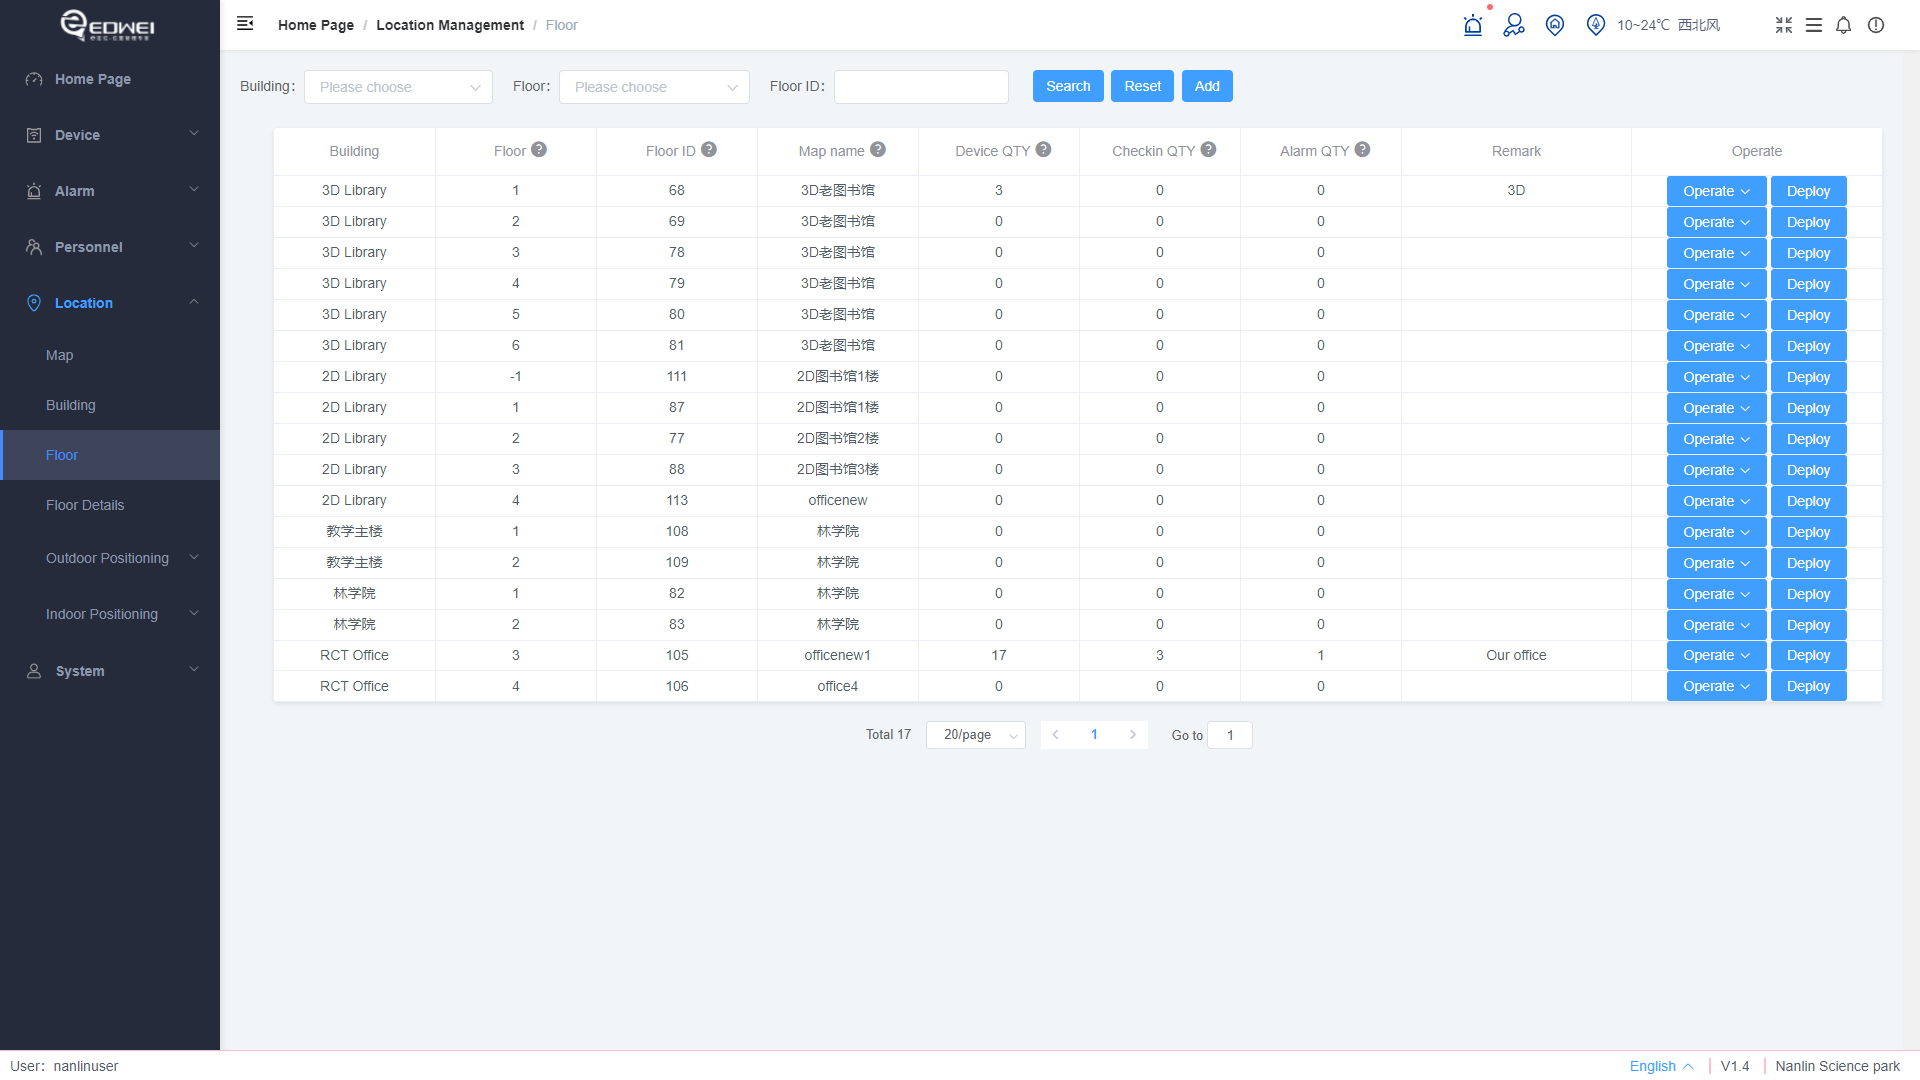 Click Deploy to enter the floor layout interface, as shown in the picture.
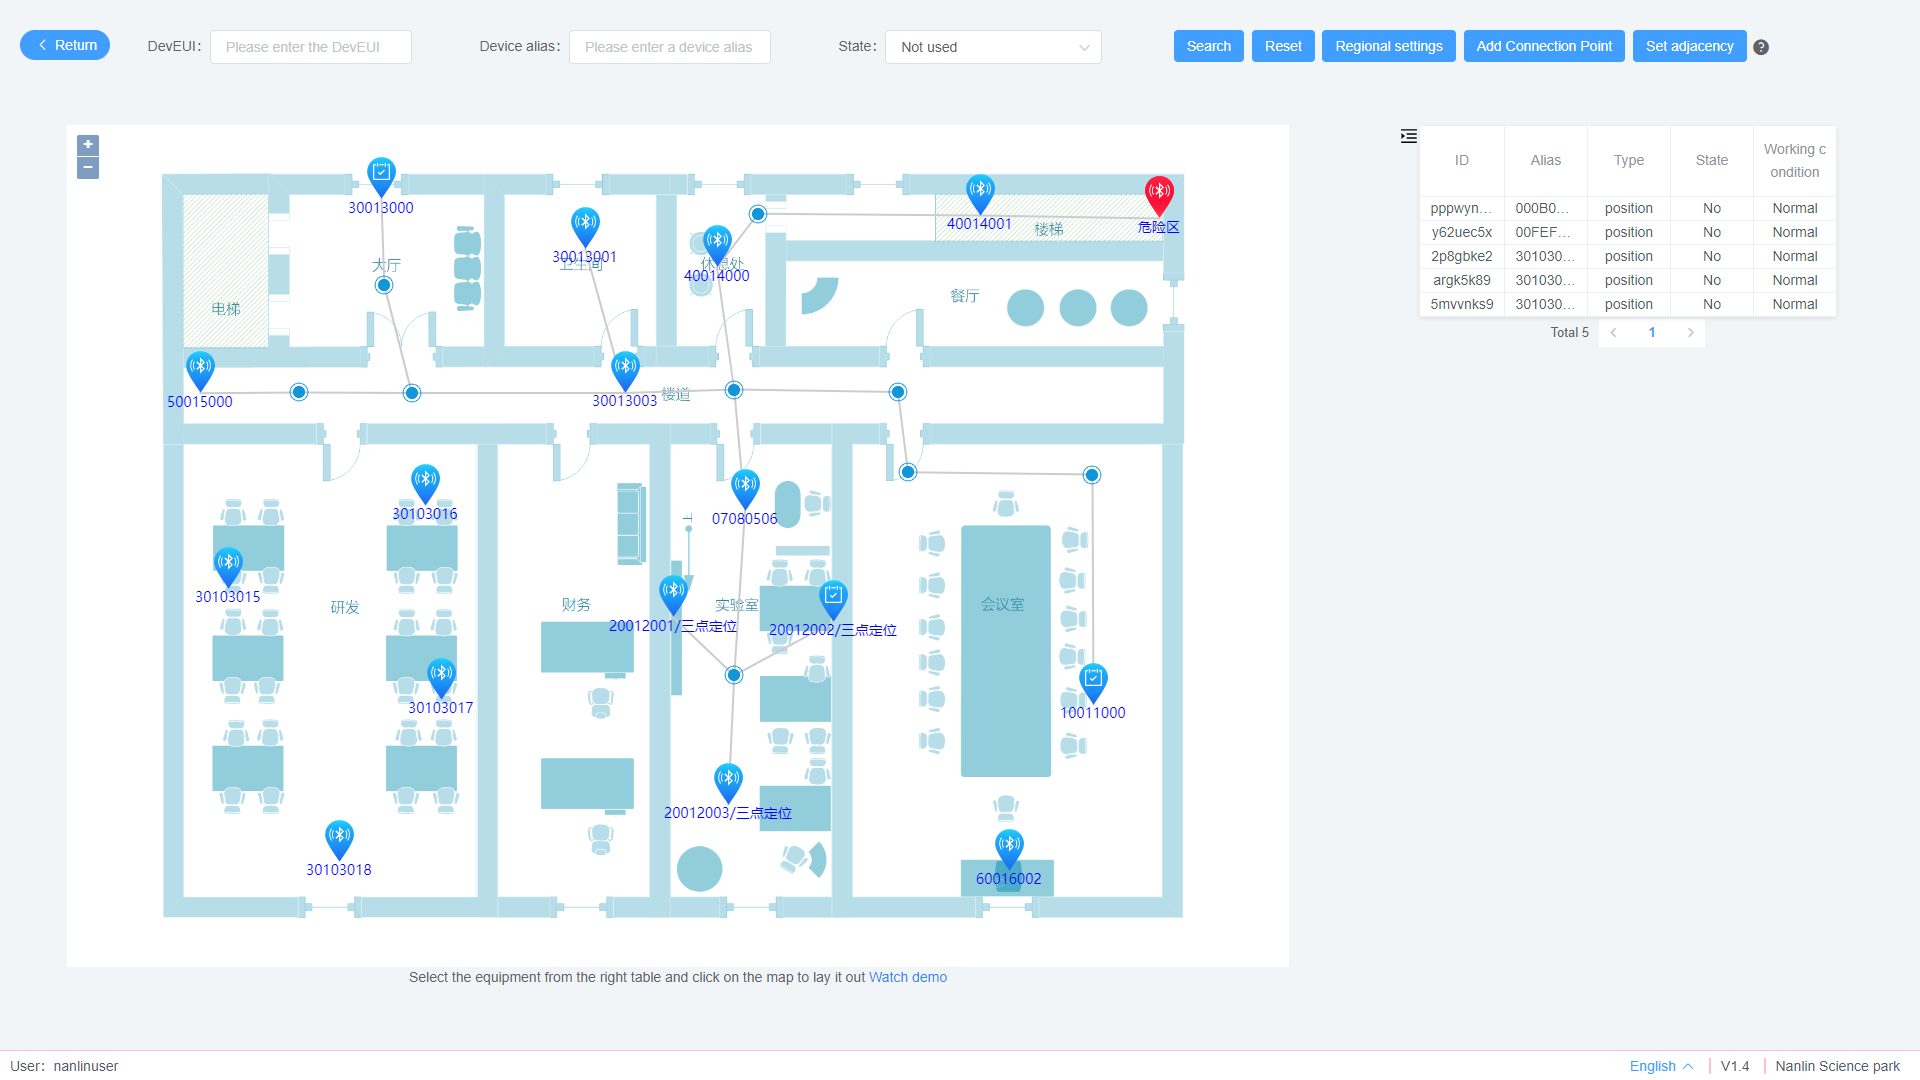
Before deploying beacons, you can add corresponding areas, which have the following functions:
- Only beacons in the same area can adopt the three-point positioning algorithm;
- When the device moves between areas, the anti-shake function can be set to prevent the device from bouncing back and forth between areas.
- You can set different alarm types for different regions. By default, all beacons are in the same region.
When the device moves between beacons, the track between beacons is straight line, and it may go through the wall. At this time, a reasonable path can be planned for the device by adding connection points and setting the beacon and each connection point as adjacent.
Set the adjacency relationship as follows:
- Select the beacon or connection point with the left mouse button.
- Press and hold the shift key, and left click to select the beacon or connection point connected to it.
- Click the button to set the adjacency relationship.
- Right click the beacon or connection point to dissolve the adjacency relationship.
All beacons available for this project are listed on the right side of the interface. Select the beacon, and then move the cursor to the location on the map where the beacon needs to be placed. Click the mouse, and the beacon will be placed at that location. Right-click the beacon to do the following with the beacon:
- Add to a region or remove from region.
- Set the punch point. After setting the punching point, when the terminal scans the beacon, it is considered that the attendance punching is successful.
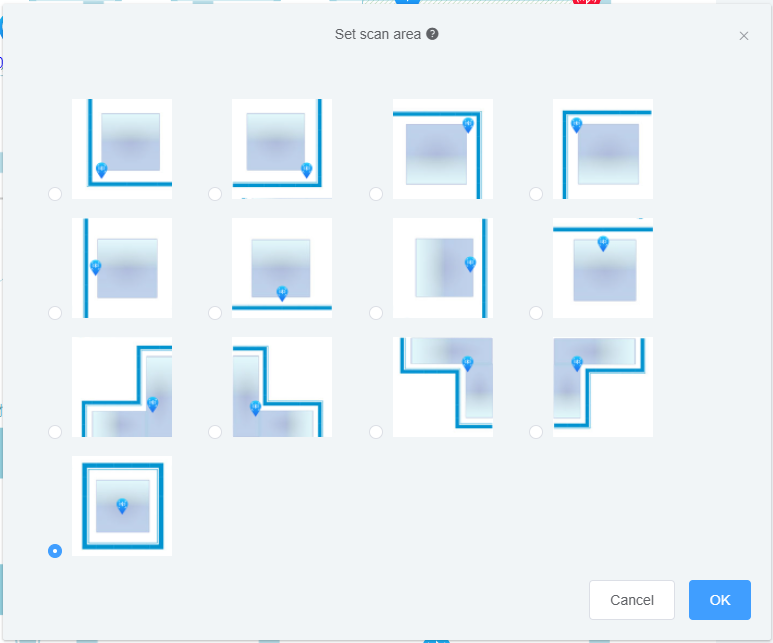
- Scan area. It is mainly used for area positioning (single point positioning, as opposed to three-point positioning). According to the specific position of the beacon deployed on the map, when the terminal scans the beacon, the terminal can display itself in the appropriate position to prevent it from going beyond the map.
For specific operations, you can click the demo at the bottom of the page to learn.
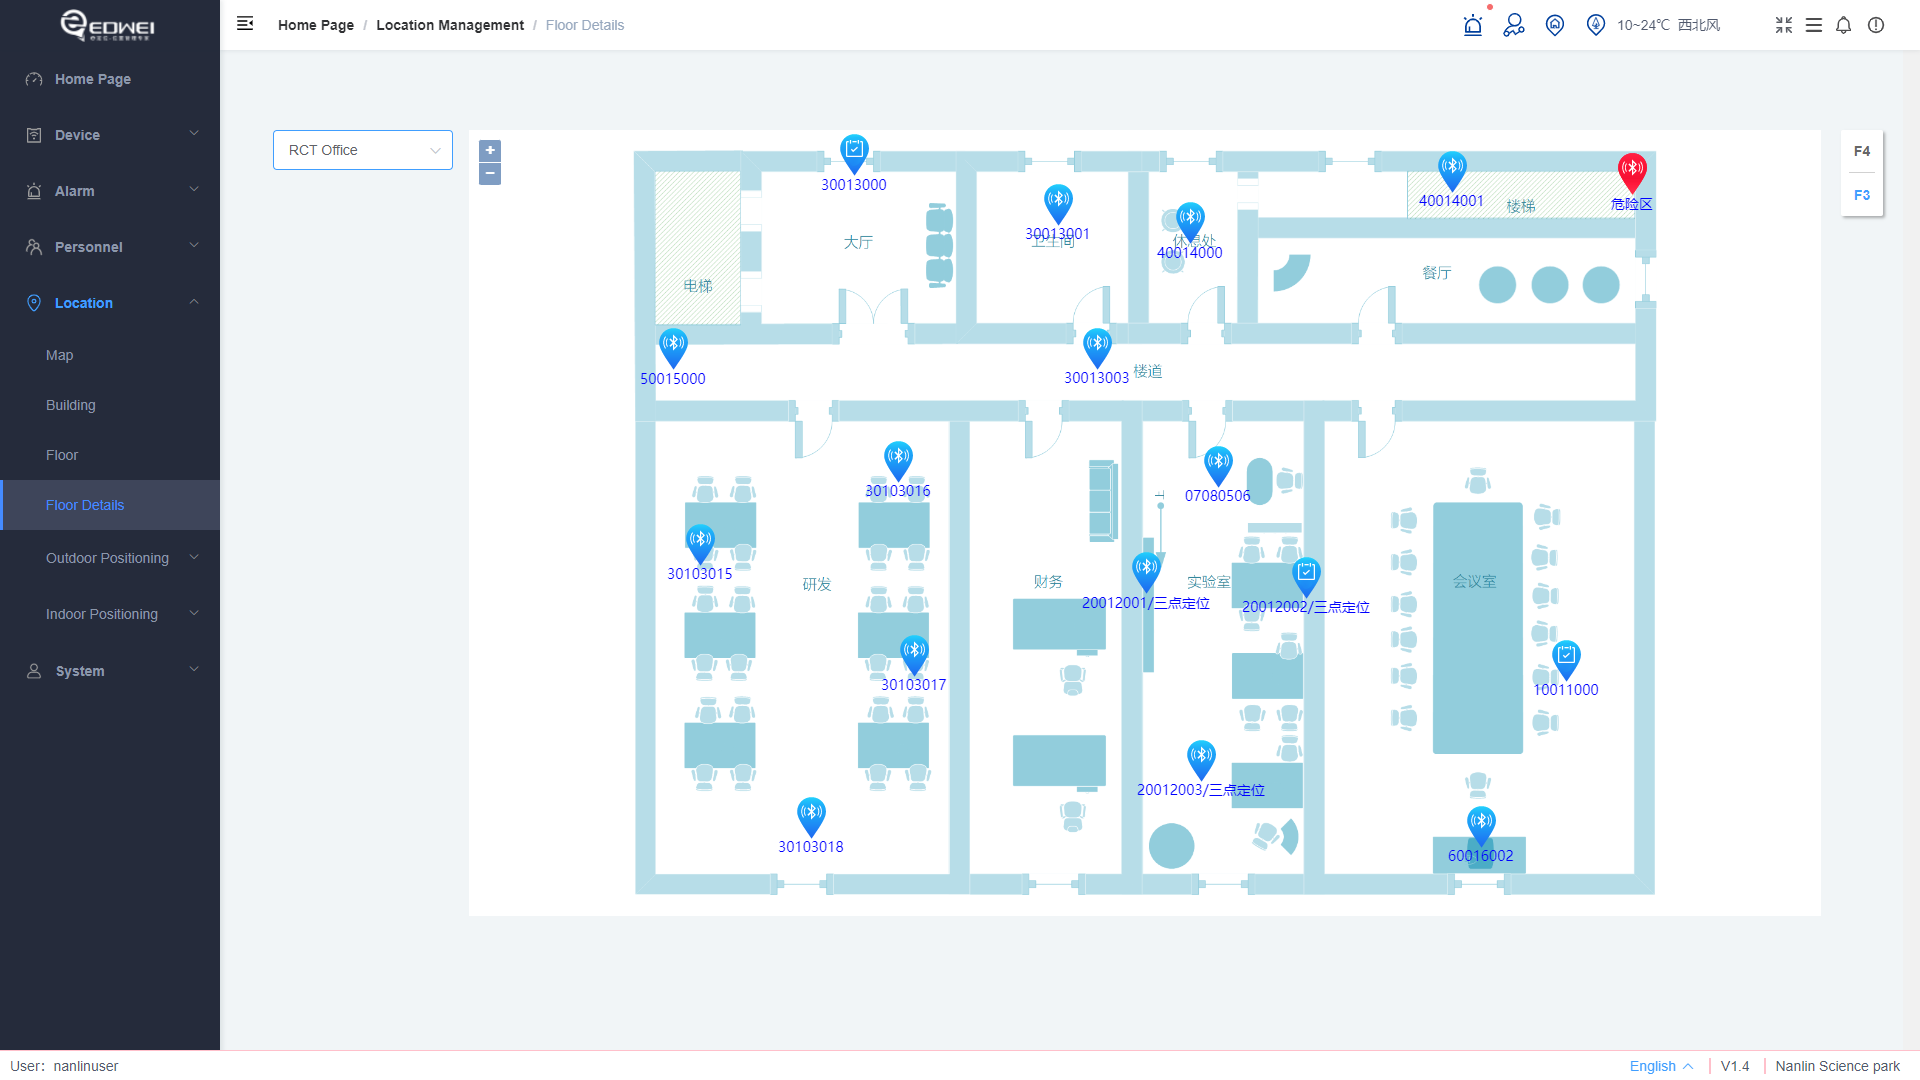
# Floor Details
In the floor details, you can view the detailed arrangement of beacons on each floor.
# Outdoor Positioning
Outdoor positioning is divided into two interfaces: real-time positioning and historical track. The administrator controls whether outdoor location is visible. If the system does not provide the outdoor location function, you can set this page to invisible.
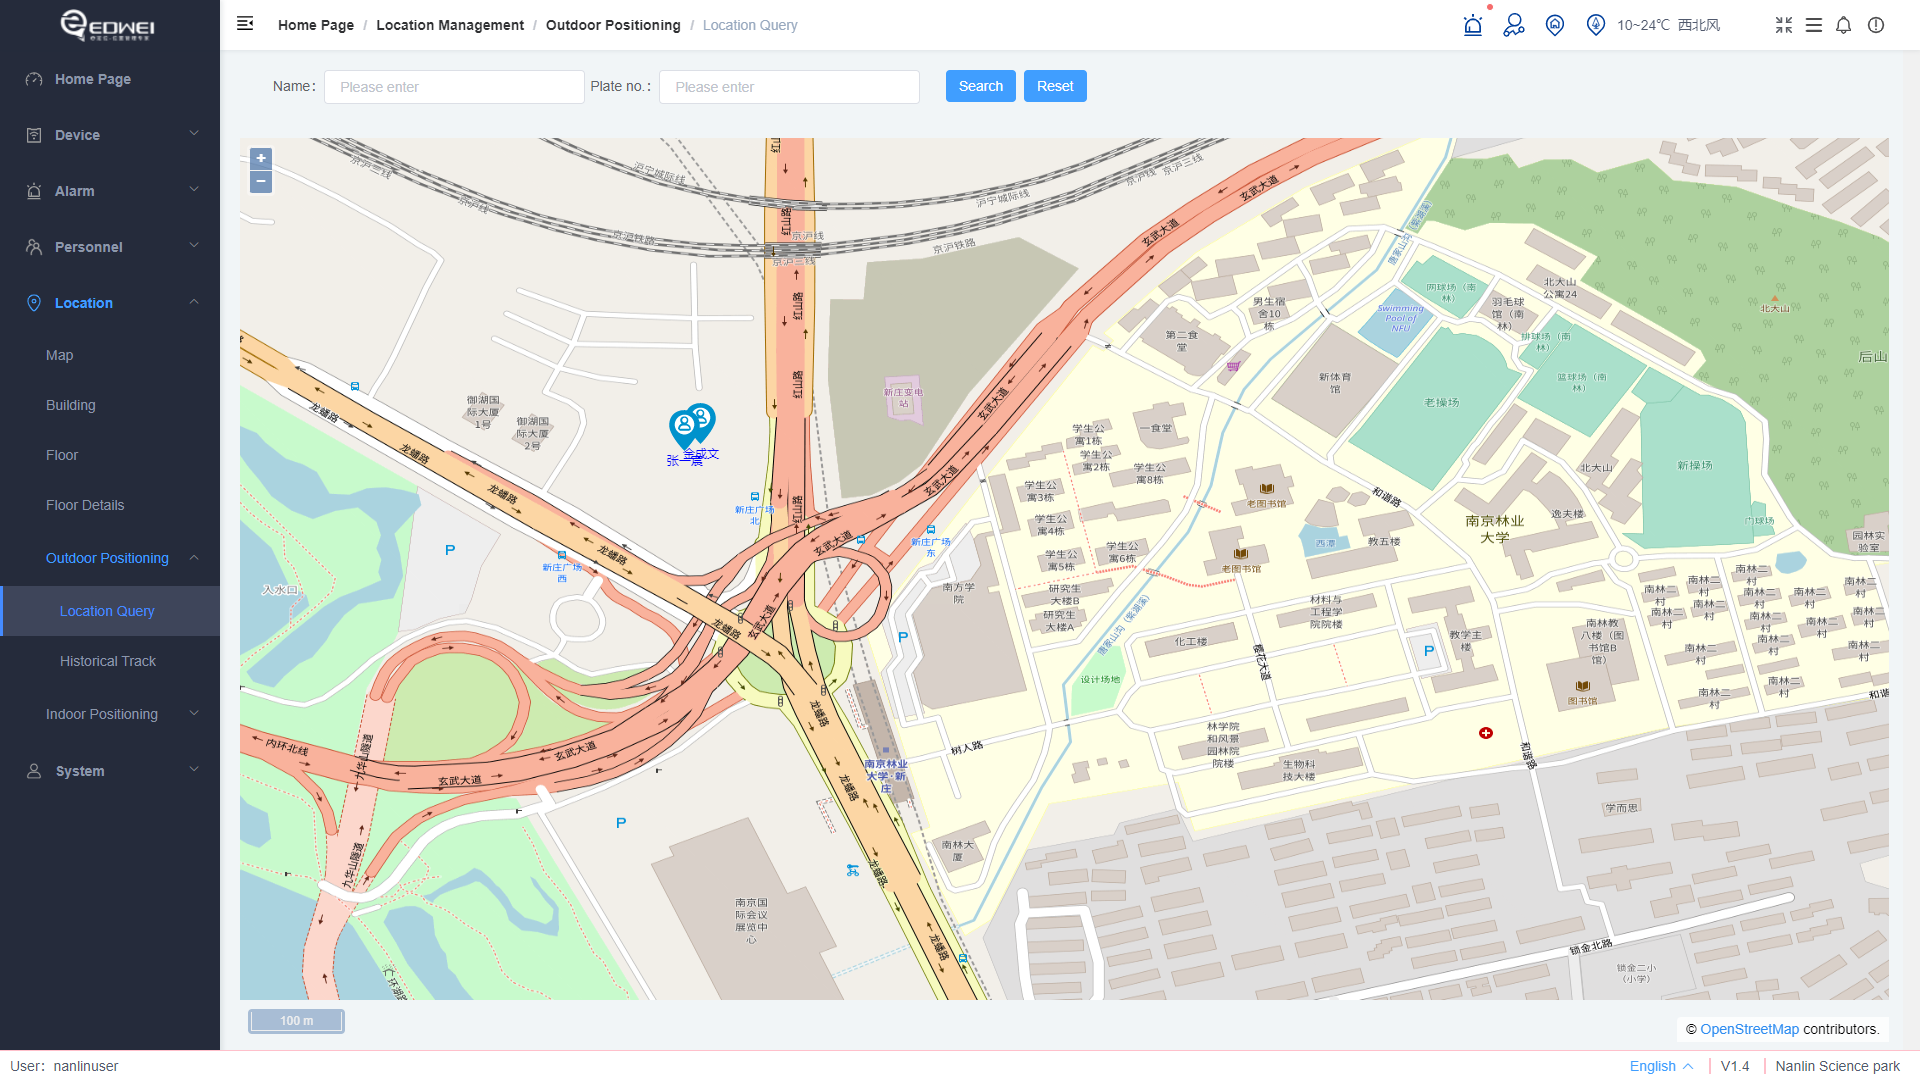
# Location Query
Query the location of the terminal device. Enter the employee name to query the outdoor location of the device. If the device is in the room, the device is automatically displayed on the indoor map.
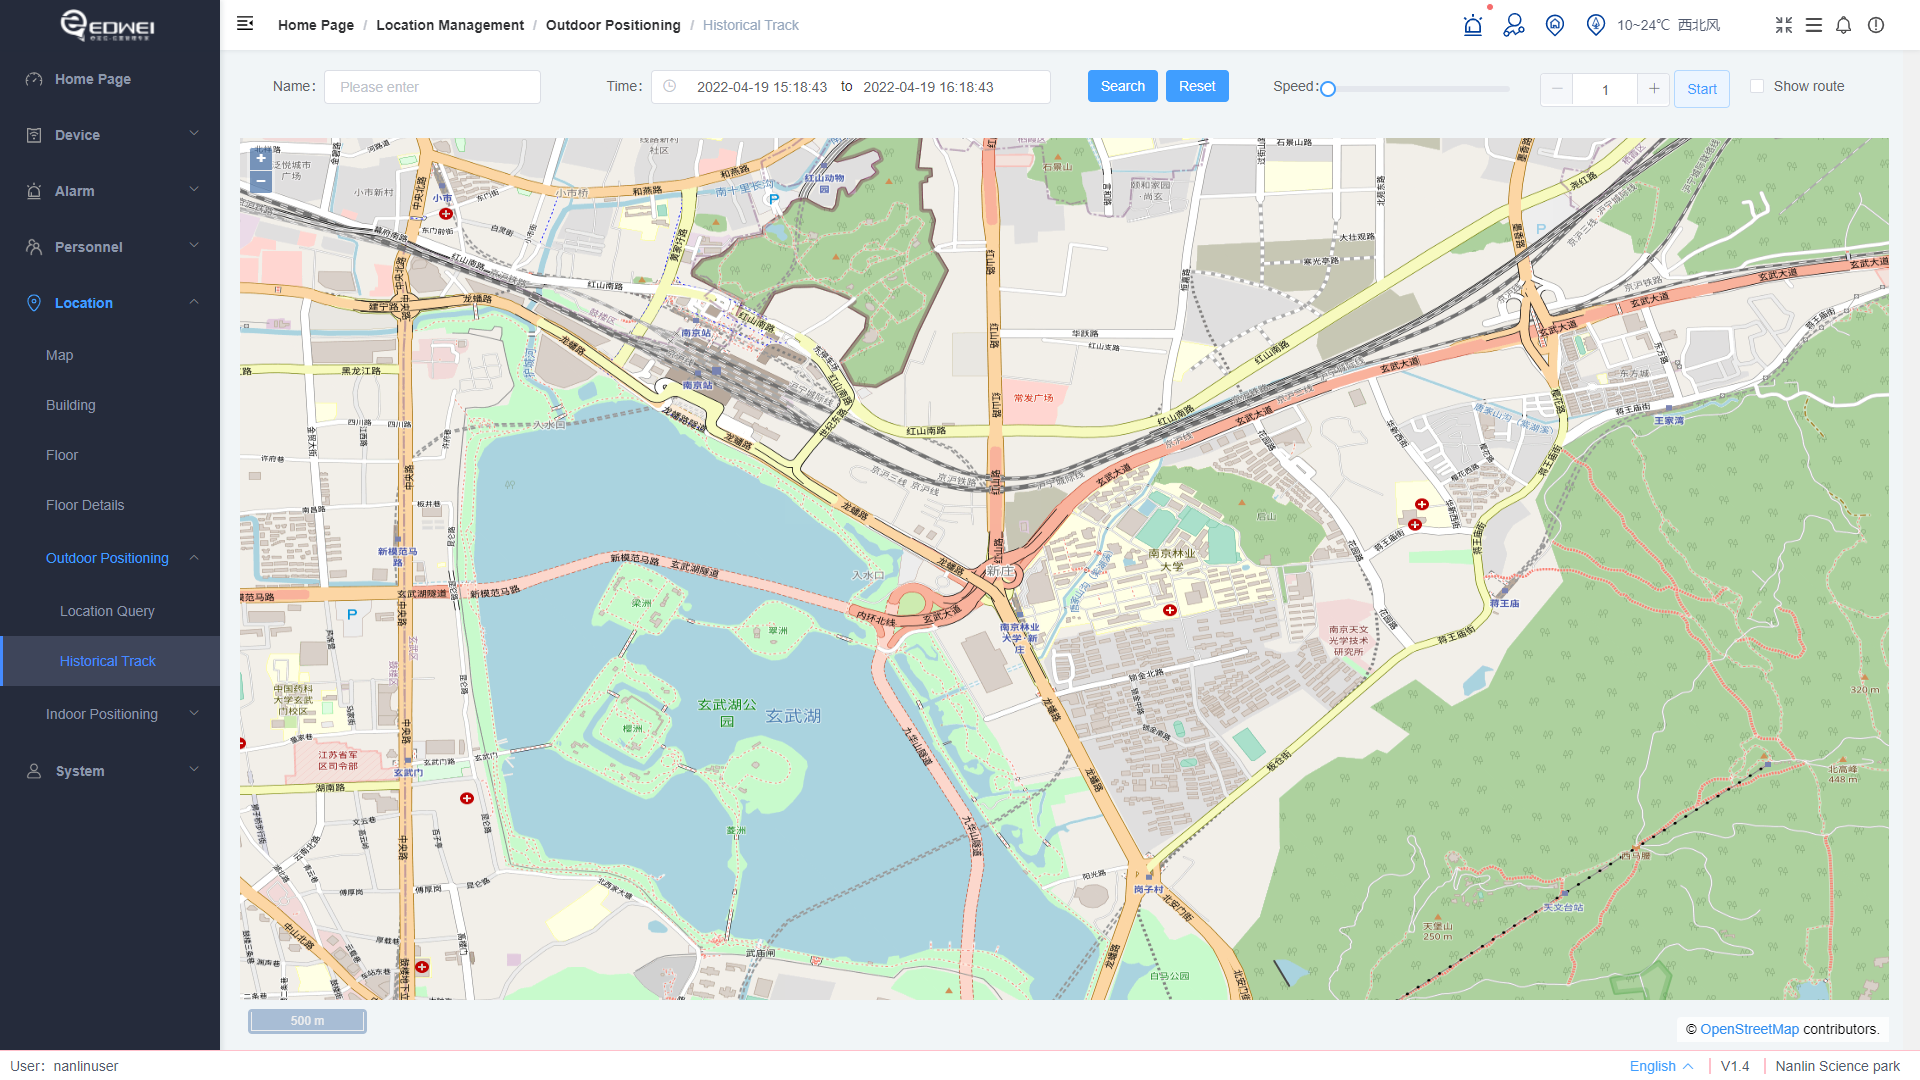
# Historical Track
Displays the outdoor historical track information of a terminal device. You can query it by time segment.
# Indoor Positioning
Indoor location includes location query and data analysis. The administrator controls whether indoor location is visible. If the system does not provide the indoor location function, you can set this page to invisible.
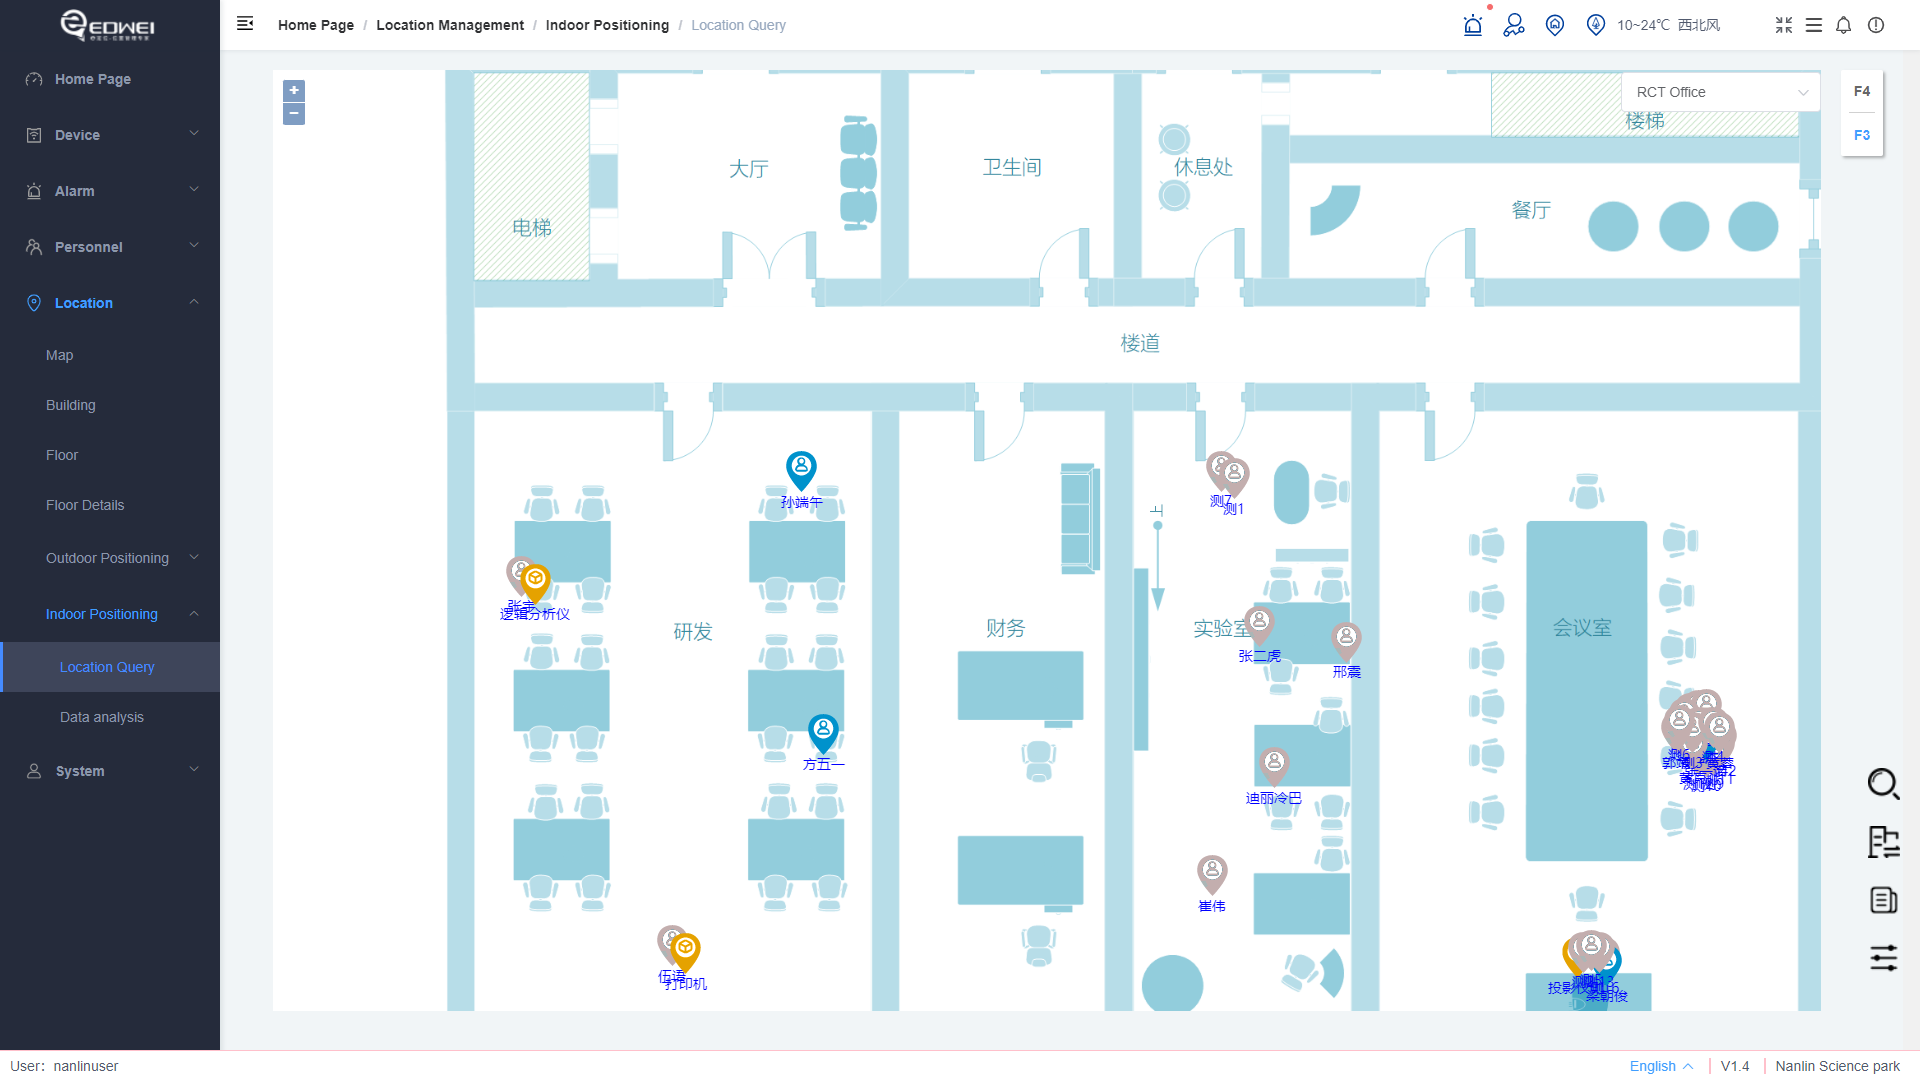
# Location Query
By default, indoor maps show all people, assets, or vehicles on the current map. You can set filters to show only people, assets, vehicles, or a combination of them, or you can filter by location time, such as showing only devices whose location has changed in the last 5 minutes. When you query the indoor location of a terminal device, enter the name of the employee or asset to be queried to query its indoor location. If the current device is outdoors, you can view the device on the outdoor map.
On the indoor map, you can switch to other buildings or floors.
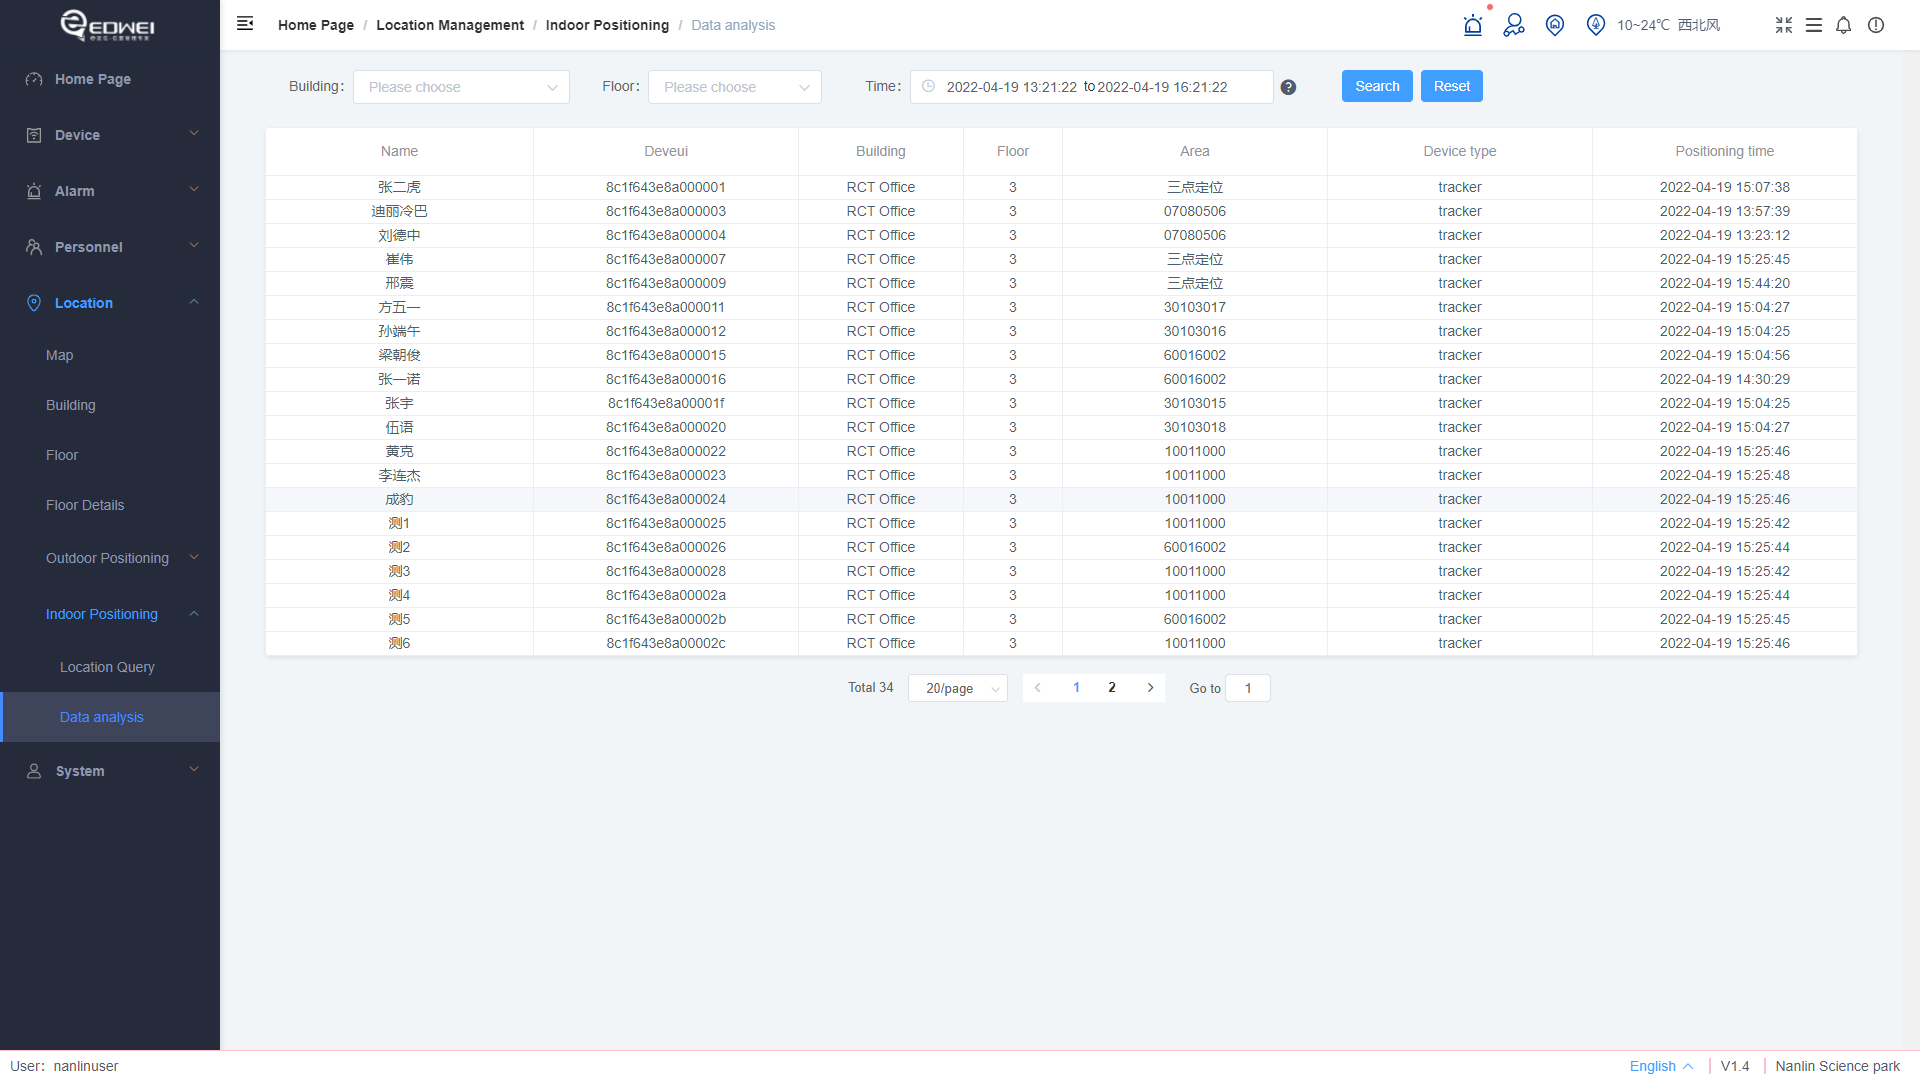
# Data Analysis
You can view the personnel of a building or floor in a certain period of time.
# System
System management includes personal center and my tickets.
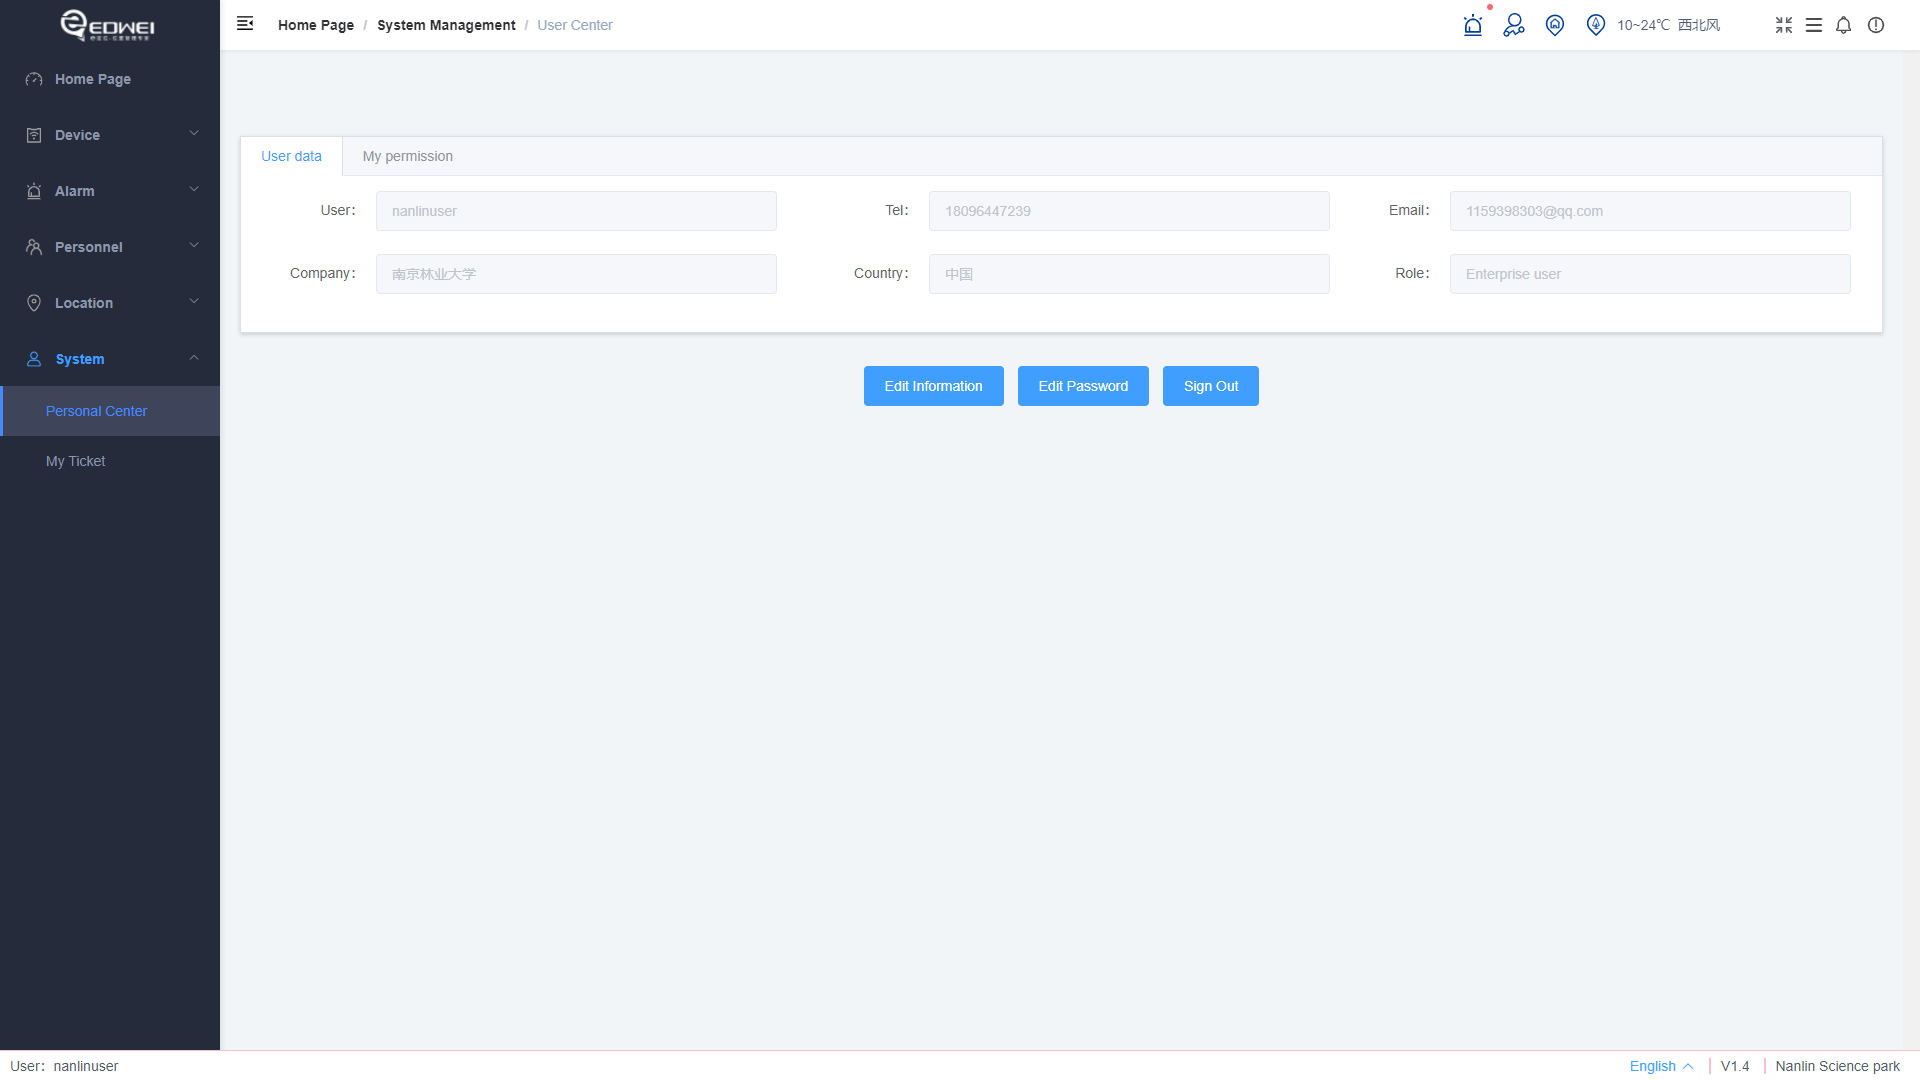
# Personal Center
You can view and modify your personal information, login permission, and setting permission of the Logo.
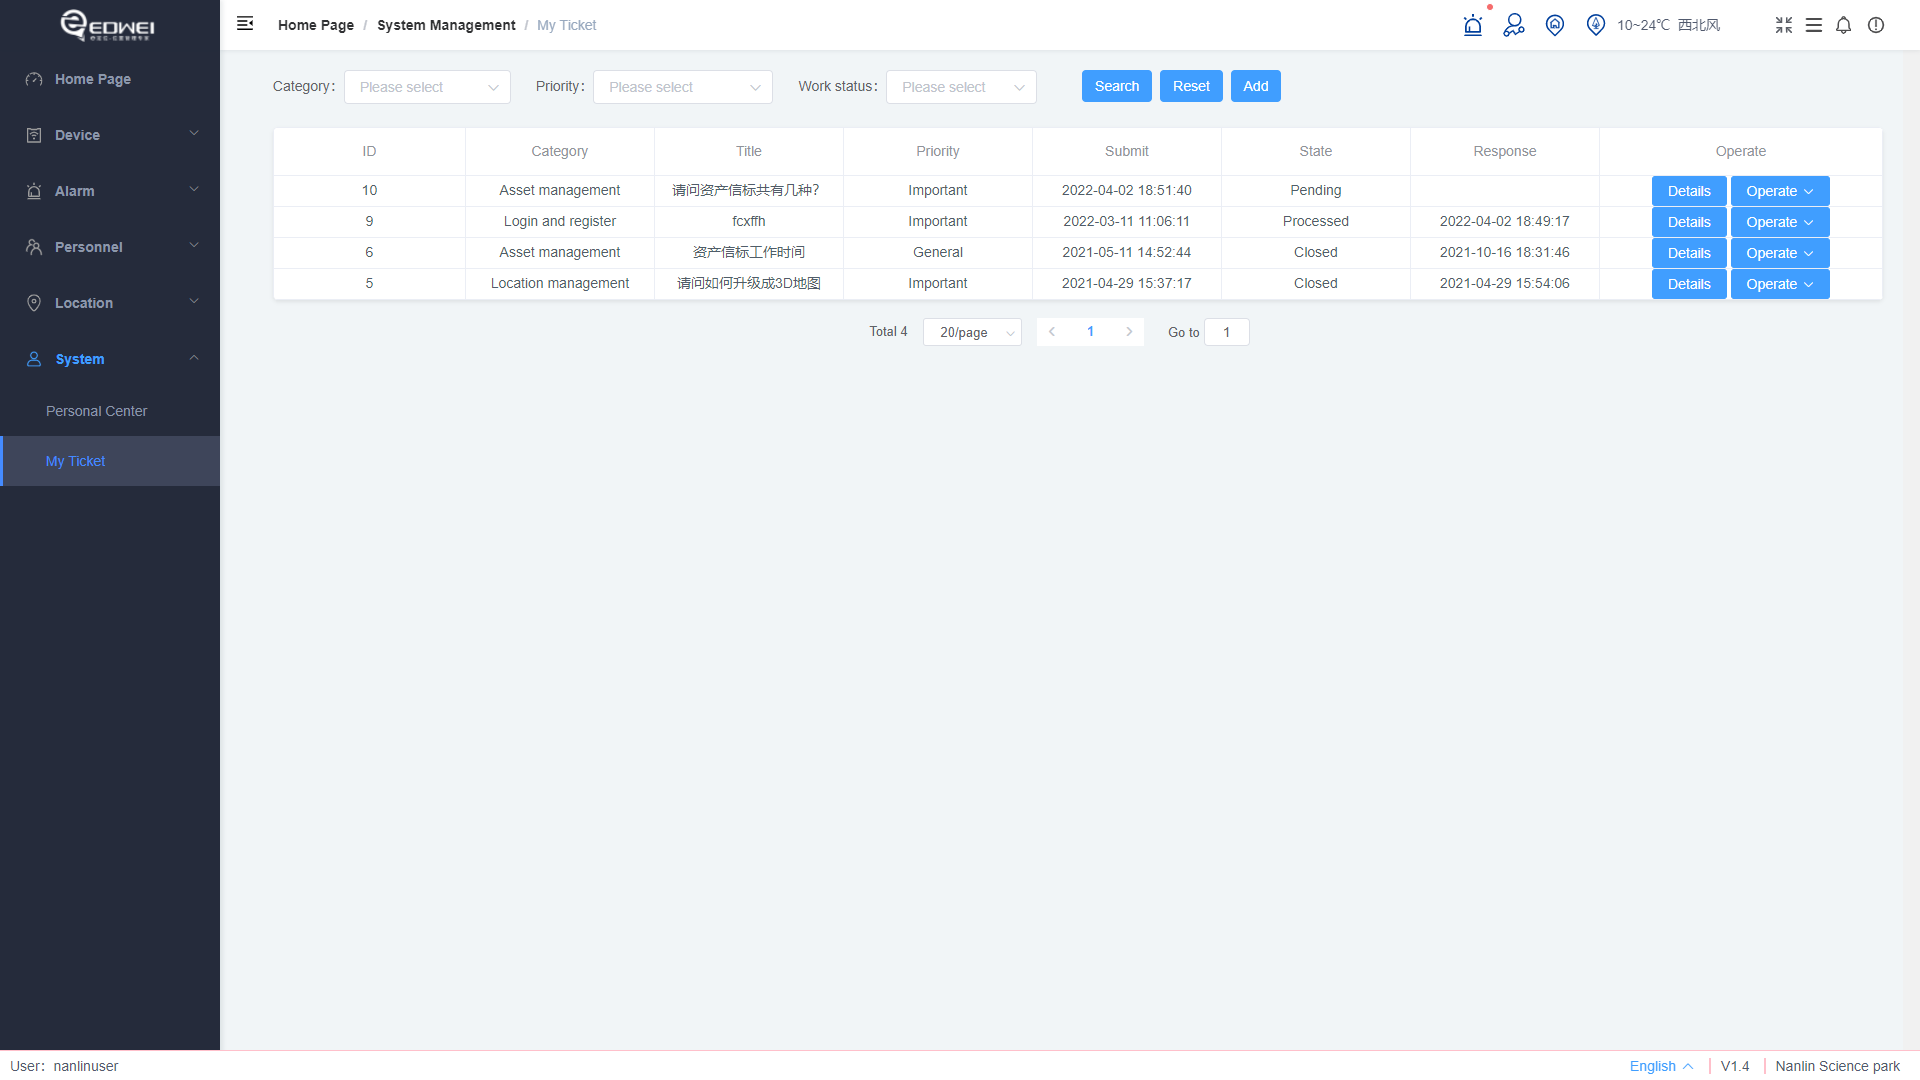
# My Ticket
You can submit a ticket if you encounter any problems in use. After the ticket is processed, you will receive a notice in the system.
FAQ →